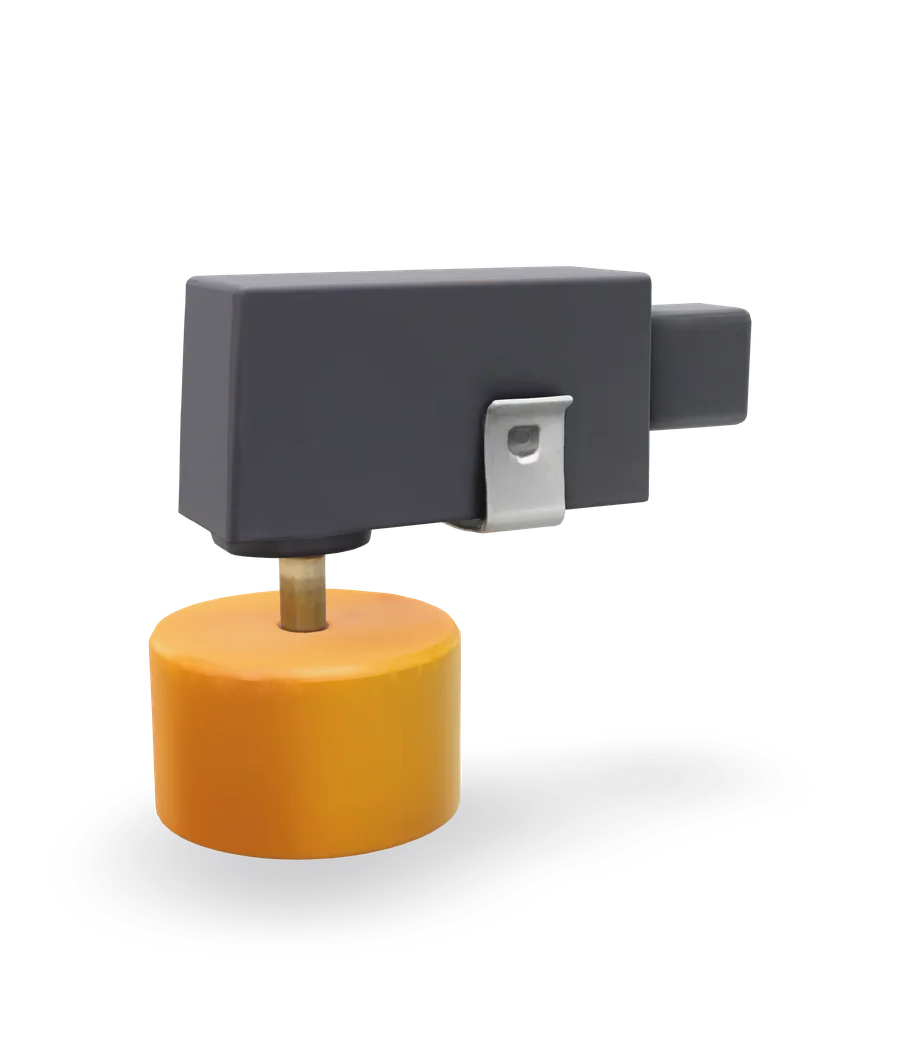
Air handler float switch: test and replace
System shut off and will not restart, with water in the pan? The float switch is doing its job. Clear the drain first. If the switch itself has failed, a new one is an inexpensive, low-voltage swap.
- Difficulty
- Easy
- Time
- 20–45 min
- Typical part cost
- $15–$50Pro: $120–$520
- Tools
- 6See the list
The switch is on the 24 V circuit and the wiring is two wire nuts or two terminals. The care goes into the power-off routine, since the control compartment shares space with 240 V wiring.
What it does
What the float switch does
A float switch is a small float on a stem or in a tee. Some clip onto the edge of the drain pan or the secondary pan under the unit. Others sit in a tee on the primary drain line.
It is wired into the 24 V thermostat circuit, usually the red R wire, and stays closed while the float is down. When water lifts the float, the switch opens and the system stops. Wired into R it shuts the whole unit down. Some air handlers have a pair of terminals on the control board for it instead, and turn the outdoor unit off and show a fault code.
On that kind of control, the system starts again on its own once the water has dropped and the switch has closed for a short time.
Why it fails
Most of the time a tripped float switch is not broken. Water in the pan from a clogged drain line lifted it, exactly as designed.
The switch itself can stick. Slime and debris build up around the float and the stem, so it hangs up or stays lifted. The maker's instructions call for inspecting, cleaning and testing it regularly, and replacing it if it fails the test or is damaged.
It only watches the spot where it is installed. A clog upstream of a drain line switch will not trip it.
Symptoms
Signs of a bad float switch
Cooling shut off, water in the pan
The float has lifted and cut the control circuit. Clear the drain line first. Once the water drops, the system should restart.
Full diagnosisOff with a dry pan
The pan and the line are clear but the system still will not run. The float may be stuck up with slime, or the switch has failed open.
Water overflows and the system keeps running
The float should have stopped the system. It may be stuck down, set too high, or mounted upstream of the clog. Turn the system off and fix the drain, then test the switch.
Full diagnosis
How to test it
Test the float switch before you buy
- Do this only on a switch you can reach with every panel on, such as one on the secondary pan or the drain line outside the cabinet. Never reach into an open air handler that has power on.
- With the system cooling, find the float.
- Lift the float gently by hand.
- Lower it again and wait.
- Good
- The system stops when you lift the float, and starts again a short time after you lower it. The switch works.
- Bad
- Nothing stops when you lift the float, or the system will not restart with the float down and the pan dry. The switch is stuck or has failed. Test it with a meter.
- Turn off the thermostat, every breaker for the air handler and the disconnect, and prove the power is off with a voltage tester.
- Disconnect the switch's two leads from the circuit. On a switch with three leads, use the pair marked normally closed.
- Touch one probe to each lead with the float hanging down.
- Lift the float and watch the meter.
A good switch typically reads
Near 0 Ω (continuity) with the float down; OL with the float lifted
Typical range. Check your part label or manual for the exact spec.
- Good
- Continuity with the float down and an open reading (OL) with it lifted. The switch is fine. Look at the drain or the wiring instead.
- Bad
- OL with the float down, or continuity that never breaks when you lift it. Clean the float and stem and test again. If it still fails, replace the switch.
Safety first
Before you touch anything
- 1
Every breaker, the disconnect, then prove it
Set the thermostat to off. An air handler with heat strips runs on 240 V and often has two breakers or a double breaker in the panel, plus a disconnect beside the unit. Turn all of them off. The float switch is low voltage, but its wires end in the control compartment beside 240 V wiring, so check with a voltage tester at the unit before you reach in.
- 2
Never bypass the switch
Do not jumper, tape up or remove the float switch to get the system running. It is the only thing between a clogged drain and water damage. Fix the drain, or fit a new switch.
Tools you'll need
Grab these first
Tool and part links are affiliate links. We may earn a commission at no extra cost to you, and it never changes what we tell you to check first. How this works
- Non-contact voltage testerPen styleProves the power is off before you open the control compartment, which also holds 240 V wiring.Typically $15–$30Shop this tool
- Digital multimeterΩ, V, µF, µAChecks the switch for continuity with the float down and lifted.Typically $25–$60Shop this tool
- Nut driver1/4 in. hexBlower and control door screws are often 1/4 in. hex heads.Typically $6–$15Shop this tool
- Multi-bit screwdriverPhillips, flat, squareLoosens the switch's mounting screw and any terminal screws on the control board.Typically $10–$25Shop this tool
- Wire stripperStrips fresh wire ends if the old splice has to be cut off.Typically $10–$25Shop this tool
- Painter's tape and markerLabels the two wires the switch connects to before anything comes apart.Typically $5–$12Shop this tool
- Shop vacuumOptionalPulls standing water out of the pan before you work around it.Typically $40–$90Shop this tool
Step by step
How to replace the float switch
- 1
Turn off the thermostat, the breakers and the disconnect
Set the thermostat to off.
At the panel, turn off every breaker that feeds the air handler. With heat strips there are often two breakers or one double breaker. Then switch off the disconnect beside the unit.
- 2
Find the switch and why it tripped
Look on the edge of the drain pan, on the secondary pan under the unit, and on the primary drain line near the unit. The switch has a float and a pair of thin wires running back to the air handler.
If there is water in the pan, the switch probably did its job. Clear the drain first with the condensate drain guide, then test the switch before you replace it.
- 3
Open the control compartment and prove the power is off
Follow the switch's wires to where they join the system. That is usually a pair of wire nuts on the thermostat wires inside the air handler, or two terminals on the control board behind the blower door.
Remove the door. Check your voltage tester on a working outlet, then hold it to the power wires where they enter the unit. It should stay quiet. If it beeps or lights, stop and find the other breaker or disconnect.
Careful. The float switch circuit is 24 V, but the same compartment can hold 240 V wiring for the blower and the heat strips. Prove it all dead.
- 4
Label and disconnect the switch's wires
Take a photo of how the switch is wired. Put tape on each wire it connects to and note where it goes.
Undo the wire nuts, or loosen the board terminals, and free the switch's two leads. If the old splice has to be cut, leave as much wire as you can.
- 5
Remove the old switch
A pan-mounted switch is usually held to the pan edge by a bracket and a thumb screw. Loosen it and lift the switch off.
An in-line switch sits in a tee on the drain line. Its float assembly lifts out of the tee. Follow the instructions that come with the new one.
- 6
Fit the new switch
Use the same type: pan-mounted for a pan, in-line for a drain line tee. It must be rated for a 24 V thermostat circuit.
On a pan, clip the bracket on at the lowest end of the pan, wires pointing up, and tighten the thumb screw. Push the stem to its lowest setting for the most sensitive water detection. Check that the float moves freely.
Buy the part
Float switch
Opens Amazon in a new tab. Where’s my model number?
What to look for
- The same mounting type as the old one: a pan-edge switch for a pan, or an in-line switch for a drain line tee of the same pipe size.
- Rated for a 24 V Class 2 thermostat circuit.
- Built for HVAC condensate. One air handler maker warns that oils from the coil can dissolve foam and some plastics, so a float switch must not be made of those.
- For a pan switch, a bracket that fits your pan's edge and depth.
Float switches are universal low-voltage parts. Any switch made for HVAC condensate that matches your mounting type and the 24 V circuit will do. Some air handlers also accept a switch on the control board's own terminals; check your manual.
- 7
Wire it the same way
Connect the new switch's two leads exactly where the old ones were, using your photo and labels. On a three-lead switch, use the normally closed pair.
Twist on the wire nuts firmly, or tighten the board terminals, and tug each wire gently to check it. Tuck the wires away from the blower.
- 8
Close up and test it
Refit the door and its screws. Switch the disconnect and the breakers back on and set the thermostat to cool.
Once the system is running, lift the float if you can reach it with every panel on. The system should stop. Lower it, and the system should start again after a short delay. If the switch sits inside the cabinet, run the continuity test on it before you close up instead.
For a switch in a secondary pan, the maker also suggests slowly filling the pan with water. The float should rise and stop the system before the pan overflows.
Buy the part
Get the right replacement
Buy the part
Float switch
Opens Amazon in a new tab. Where’s my model number?
What to look for
- The same mounting type as the old one: a pan-edge switch for a pan, or an in-line switch for a drain line tee of the same pipe size.
- Rated for a 24 V Class 2 thermostat circuit.
- Built for HVAC condensate. One air handler maker warns that oils from the coil can dissolve foam and some plastics, so a float switch must not be made of those.
- For a pan switch, a bracket that fits your pan's edge and depth.
Float switches are universal low-voltage parts. Any switch made for HVAC condensate that matches your mounting type and the 24 V circuit will do. Some air handlers also accept a switch on the control board's own terminals; check your manual.
Know your limits
When to call a pro
Stop and call a pro if
- The system still will not run with a dry pan and a switch that tests good. The control board, thermostat wiring or the outdoor unit may be the problem.
- Water is reaching a ceiling, a wall or the floor below the unit.
- You cannot tell which wires the switch belongs to, or the wiring is spliced into something other than the thermostat circuit.
- The air handler is a communicating system and the thermostat shows a fault you cannot clear.
- Your voltage tester still shows power after you have turned off every breaker and disconnect you can find.
FAQ
Float switch questions
Why did my AC shut off with water in the pan?
The float switch saw the water rising and cut the control circuit, which is its job. The cause is almost always a clogged drain line. Clear it with the condensate drain guide and the system should start again once the water drops.
Can I bypass the float switch until I fix it?
No. With the switch bypassed, a clogged drain lets the pan overflow onto whatever is under the air handler. Fix the drain or fit a new switch.
Does the switch go in the red wire or the yellow wire?
One maker's instructions put it in the red R wire, which shuts the whole unit down. Wired into the yellow cooling wire, the fan keeps running while the cooling stops. The simplest rule when replacing one is to wire the new switch exactly where the old one was.
How often should I test the float switch?
One float switch maker calls for inspecting, cleaning and testing it at least every 30 days, and after every drain line cleaning. Lift the float with the system running and make sure it stops.
Related
Keep going
- SymptomWater in the air handler drain pan: pan full or system shut offWater is backing up in the drain pan under the coil, or in the pan under the unit, and the system may have shut itself off. A clogged condensate drain is the usual cause. A stuck float switch, a coil that froze and melted, or a cracked pan are the others.Open guide
- Air handler partCondensate drain pan and lineFor heat pump and central air handlers, including units with electric heat strips. In cooling, the coil wrings water out of the air into a drain pan, and a pipe with a trap carries it away. When slime or debris blocks that pipe, the pan fills and a float switch shuts the system off.Open guide
- Air handler partControl boardThe control board in an air handler takes the thermostat's signals and switches the blower and the electric heat. A blown fuse or a burned relay on it can stop the fan, the heat, or the whole system.Open guide
Get the next fix before it breaks
A short email when the seasons turn: filters to change, detector batteries to check, and new repair guides. No spam, unsubscribe any time.
We send it with Kit. Privacy