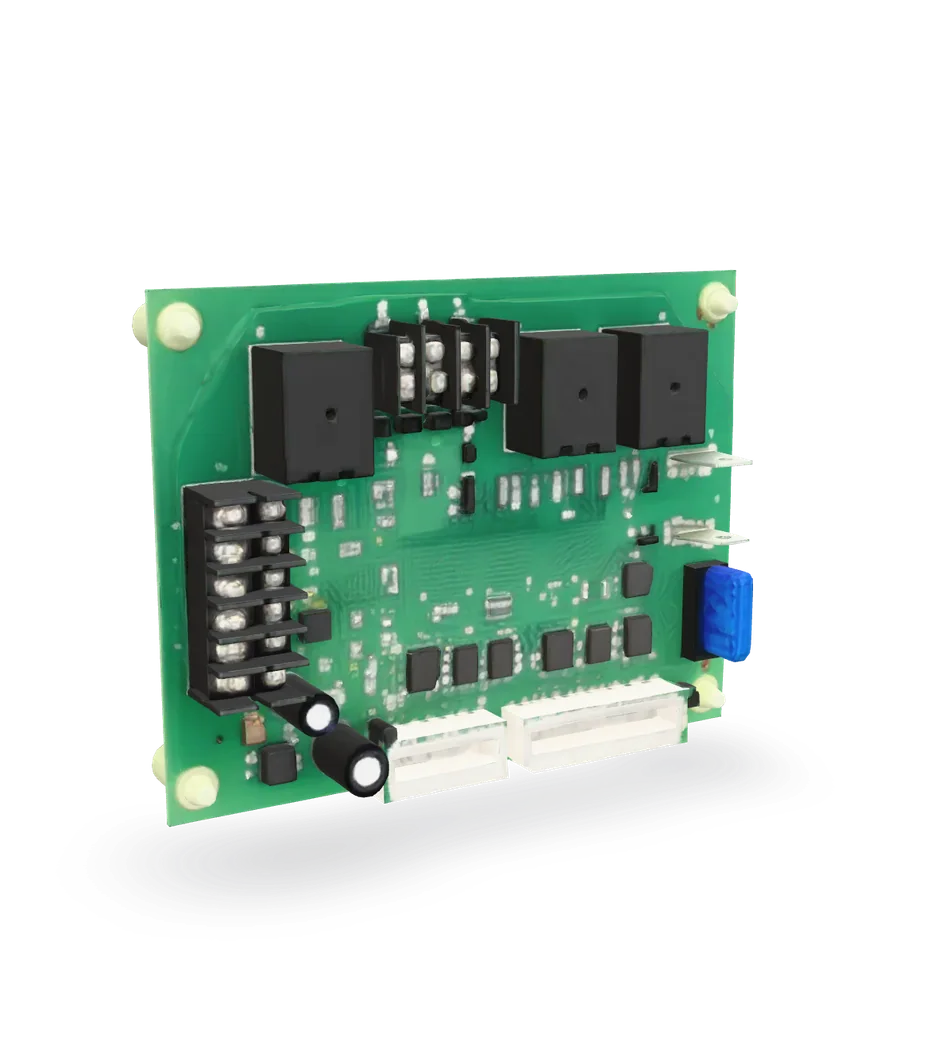
Furnace control board: read the code, test and replace
Good news: the control board tells you what is wrong. Count the blinks first. Most of the time the code points at another part, not the board.
- Difficulty
- Moderate
- Time
- 30 min–1.3 hr
- Typical part cost
- $50–$300Pro: $300–$700
- Tools
- 7See the list
Nothing hard about the screws. The care is in putting every wire back on the right terminal and copying any settings.
What it does
What the control board does
The control board is the furnace's brain. It sits in the blower compartment, with a bundle of wires plugged into it and a small status light on its face.
When the thermostat calls for heat, the board runs the whole checklist in order. It starts the inducer, waits for the pressure switch, heats the igniter, opens the gas valve, checks the flame sensor and starts the blower on a delay. It also watches every safety switch the whole time.
When a step fails, the board stops and flashes a code on that status light. That code is the most useful clue you have.
Why it fails
Boards are often blamed for problems they are only reporting. Most error codes point at a sensor, a switch or the airflow, not the board itself.
Boards do fail. Power surges, moisture dripping into the cabinet, heat, dust and plain age are the usual reasons. Look for corrosion, water stains or scorch marks.
A short in the low-voltage wiring, like a chafed thermostat wire, blows the board's fuse. Find and fix that short, or a new fuse or board will fail too.
Symptoms
Signs of a bad control board
A blinking error code
The status light flashes a pattern instead of its normal signal. The code may point at the board, but more often at another part.
Full diagnosisNo light at all
The power is on but the status light is dark and nothing happens. That can be a blown board fuse, no 24 V control power, or a dead board.
Full diagnosisOdd behavior with no matching code
The furnace will not start, starts and shuts down at once, or the blower runs nonstop, and the parts the board controls all test good.
Damage you can see
With the power off, look at the board. Scorch marks, a melted connector, corrosion or water stains mean the board is damaged.
How to test it
Test the control board before you buy
- Do not turn the power off or pull the blower door yet. On many boards, cutting the power or opening the door clears the code.
- Find the status light. Many blower doors have a small window over it, so you can watch it with the door on.
- Count the flashes. Codes usually come as a group of flashes, a pause, then the group again. Count a few rounds to be sure.
- Find the code chart. It is usually a label on the inside of the blower door or the furnace's access panel. Your installation manual has it too.
- Write down the code, or film the light with your phone. Then look up what it points at.
Codes differ from one maker to the next, and the same number of flashes can mean different things on different furnaces. Always use the chart for your unit. Typical faults on these charts include an open limit, a pressure switch problem, an ignition lockout, flame sensed when there should be none, and reversed polarity on the power wiring. Our [error code guide](/furnace/symptoms/blinking-error-code) walks through them.
- Good
- A normal signal on the chart means the board sees no fault. A code that names another part, like the pressure switch, a limit or the flame sensor, points you at that part, not the board.
- Bad
- A code that says the board has failed, or no light at all with the power confirmed on, makes the board a suspect. Check the fuse and the 24 V supply next.
- Power off at the service switch or breaker. Take off the blower door.
- Find the fuse. Many boards use a small automotive-style blade fuse plugged into the board.
- Look through the plastic top. A broken metal strip inside means it is blown.
- To be sure, pull it straight out with needle-nose pliers and touch one probe to each blade.
A good fuse shows
Continuity (near 0 Ω)
Typical range. Check your part label or manual for the exact spec. A blown fuse is a symptom, not a cause. It usually means a short somewhere in the 24 V wiring, such as the thermostat wires or a limit circuit.
- Good
- Continuity means the fuse is fine. Look at the 24 V supply next.
- Bad
- No continuity means it is blown. Find the short first, then replace the fuse with the exact rating printed on the board, the old fuse or your manual. Never fit a bigger one. If the new fuse blows too, something is still shorted. Do not keep feeding it fuses.
- Leave the furnace doors on and the power on. This test happens at the thermostat, away from the 120 V wiring.
- Pull the thermostat off its wall base. Most just lift or slide off.
- Find the terminals marked R and C. Not every thermostat has a C wire. If yours does not, skip this test.
- Touch one probe to R and one to C. Do not let the probes touch each other.
Control power typically reads
About 24 V AC
Typical range. Check your part label or manual for the exact spec. Low voltage, but still a live test. Keep the probe tips apart and off any other wires. If you are not comfortable, skip it.
- Good
- A reading near 24 V means the transformer and fuse are feeding the board. If the board still does nothing, it is a real suspect.
- Bad
- No voltage means no control power. Check the board fuse, the blower door switch and the breaker. A good fuse and still no voltage points at the transformer, which a pro should test.
Safety first
Before you touch anything
- 1
Kill the power
Write down any blink code first. Then flip the service switch off, or turn off the furnace breaker. The board light should go dark.
- 2
Prove it is dead
The board has 120 V on some of its terminals. Hold a non-contact voltage tester to the wires on the board before you touch anything.
- 3
Mind the static
Before you touch either board, touch a clean, unpainted metal part of the furnace to drain any static charge. Hold the new board by its edges.
Tools you'll need
Grab these first
Tool and part links are affiliate links. We may earn a commission at no extra cost to you, and it never changes what we tell you to check first. How this works
- Nut driver1/4 in. hexDoor screws and board mounting screws are often 1/4 in. hex heads.Typically $6–$15Shop this tool
- Digital multimeterΩ, V, µF, µAChecks the board fuse and the 24 V control power.Typically $25–$60Shop this tool
- Non-contact voltage testerPen styleConfirms the board is dead before you touch the 120 V wires on it.Typically $15–$30Shop this tool
- Painter's tape and markerLabel every wire before it comes off. This is the step that makes or breaks the job.Typically $5–$12Shop this tool
- Needle-nose pliersPulls small spade connectors and the blade fuse without stressing the board.Typically $8–$20Shop this tool
- Multi-bit screwdriverPhillips, flat, squareThermostat wires on the board's terminal strip use small screws.Typically $10–$25Shop this tool
- HeadlampLets you read tiny terminal labels with both hands free.Typically $12–$30Shop this tool
Step by step
How to replace the control board
- 1
Write down the code, then shut off the power
Note the blink code if there is one. Then flip the service switch to off, or turn off the furnace breaker.
Make sure the code really points at the board. If it names another part, start with that part's guide instead.
Tip. A phone video of the blinking light is an easy way to count it later.
- 2
Take off the blower door
The lower door covers the blower compartment. Most lift up and pull away. Some have screws along the edge.
The board is mounted on a wall of the blower compartment or on a bracket in front of the blower.
- 3
Check that the board is dead
Check your voltage tester on a live outlet first so you know it works. Then hold it near the wires on the board. It should stay quiet.
Then look the board over. Scorch marks, a melted connector, corrosion or water stains are worth a photo. Water stains mean a leak above the board, and that needs fixing too.
- 4
Photograph and label every wire
Take clear photos of the whole board from straight on, then close-ups of each corner. Make sure every terminal label is readable.
Put a strip of tape on each wire and write the terminal name on it, exactly as printed on the board. Do the thermostat wires on the low-voltage strip too.
Careful. Do not skip this. Wires on the wrong terminals can damage the new board on the first power-up.
- 5
Copy the settings
Look for small DIP switches or jumpers on the old board. On many boards they set things like how long the blower keeps running after the burners stop.
Write down the position of each one. You will set the new board the same way, unless its instructions say otherwise.
Tip. Also note which wires go to which blower speed terminals, often marked HEAT and COOL.
- 6
Disconnect the wires
Pull each labeled wire off the board. Grip the connector, not the wire. Squeeze the latch on the multi-pin plugs and pull them straight out.
Loosen the small screws on the thermostat terminal strip and slide those wires out.
- 7
Remove the old board
Remove the mounting screws, or squeeze the plastic standoffs, and lift the board off.
- 8
Match the new board
Compare the new board with the old one. The part number, or the list of furnaces it replaces, should cover yours.
A universal board comes with an instruction sheet and a wiring diagram that maps your old terminals to its own. Keep it beside you, along with the wiring diagram on the inside of your furnace door.
Careful. Drain your static on the cabinet metal before you take the new board out of its bag.
Buy the part
Control board
Opens AppliancePartsPros in a new tab. Where’s my model number?
What to look for
- The part number printed on the old board's sticker. This is the surest match.
- Or your furnace model number from the rating plate. Boards are often specific to a model family.
- A universal board only if its instructions list your original part number or furnace as compatible.
Universal boards cover many single-stage furnaces and cost less. Only use one that lists your original part or furnace, and wire it exactly as its sheet shows.
- 9
Mount the new board
Set the DIP switches and jumpers to match your notes, or to the setting the new board's sheet gives for your furnace.
Mount the board on the same screws or standoffs.
- 10
Connect the wires
Work through your labels and photos. Push each wire onto its terminal, plug in the multi-pin connectors until they click, and move the thermostat wires to the same letters on the new terminal strip.
Check each connection against the new board's wiring diagram. Make sure no wire is pinched or resting on the blower.
Tip. Tick off each label on your photo as you go.
- 11
Close up and power up
Refit the blower door so it presses the door switch. Turn the power on.
The status light should show the normal signal from the code chart. Set the thermostat a few degrees above room temperature and watch one full cycle: inducer, glow, flame, then blower.
Tip. If it flashes a code right away, power off and check your wiring against the photos before anything else.
Buy the part
Get the right replacement
Buy the part
Control board
Opens AppliancePartsPros in a new tab. Where’s my model number?
What to look for
- The part number printed on the old board's sticker. This is the surest match.
- Or your furnace model number from the rating plate. Boards are often specific to a model family.
- A universal board only if its instructions list your original part number or furnace as compatible.
Universal boards cover many single-stage furnaces and cost less. Only use one that lists your original part or furnace, and wire it exactly as its sheet shows.
Know your limits
When to call a pro
Stop and call a pro if
- The board shows scorch marks or melted parts. Something drew too much current, and that cause has to be found before a new board goes in.
- The board fuse blows again right after you replace it. There is a short somewhere in the wiring or a part.
- Your furnace has a communicating or modulating system. Those boards are more complex and often need setup a homeowner cannot do.
- The code points at the gas valve or a flame rollout switch.
- You smell gas. Leave the house now and call your gas utility or 911 from outside. Do not flip switches on the way out.
- The new board flashes the same code as the old one. The problem was somewhere else.
FAQ
Control board questions
How do I know if my furnace control board is bad?
Read the blink code first. If it points at another part, test that part. Suspect the board when the code says so, when it is visibly damaged, or when it has 24 V power and a good fuse but still does nothing or acts erratically.
Where do I find what the blink code means?
On a label inside the blower door or access panel, or in your installation manual. Codes differ from one maker to the next, so use the chart for your furnace. Our error code guide explains the common ones.
Can I replace a furnace control board myself?
Yes, if you are careful. It is mostly about putting every wire on the right terminal and copying any switch settings. Photograph and label everything first. If your system is a communicating or modulating type, call a pro.
Why does my board fuse keep blowing?
Something on the 24 V side is shorting, often a damaged thermostat wire or a fault in a limit circuit. Swapping fuses will not fix it. Find the short, or call a pro.
Will turning the power off and on fix a control board error?
It clears a lockout, so the furnace tries again. Write the code down first, because on many boards cutting the power erases it. If the same code comes back, the fault is real.
Related
Keep going
- SymptomFurnace control board blinking an error codeThe light on the control board flashes a code when something fails. Count the flashes, match them to the chart inside the blower door, and write the code down before you reset anything.Open guide
- SymptomFurnace won't turn on at allNothing happens when the thermostat calls for heat. The cause is usually a switch, a breaker, the thermostat or a loose blower door. After that, look at the board fuse and the control board.Open guide
- SymptomFurnace blower won't turn onThe big fan that pushes warm air to your vents does not start. A humming motor that never spins points to the run capacitor. Silence points to the door switch, a fuse, the board or the motor.Open guide
- Furnace partPressure switchThe pressure switch proves the inducer fan is pulling exhaust out before the furnace is allowed to light. When it stays open, the inducer runs and nothing else happens. Often the real fix is a clear hose or vent.Open guide
- Furnace partHigh limit switchThe high limit switch shuts the burners off if the furnace gets too hot. It trips most often because of poor airflow, so check the filter and the blower before you replace it.Open guide
- Furnace partFlame sensorThe flame sensor is a thin metal rod that proves the burners are really lit. A dirty one is a classic reason a furnace lights and then shuts off seconds later. Cleaning it, or swapping it, is a one-screw job.Open guide