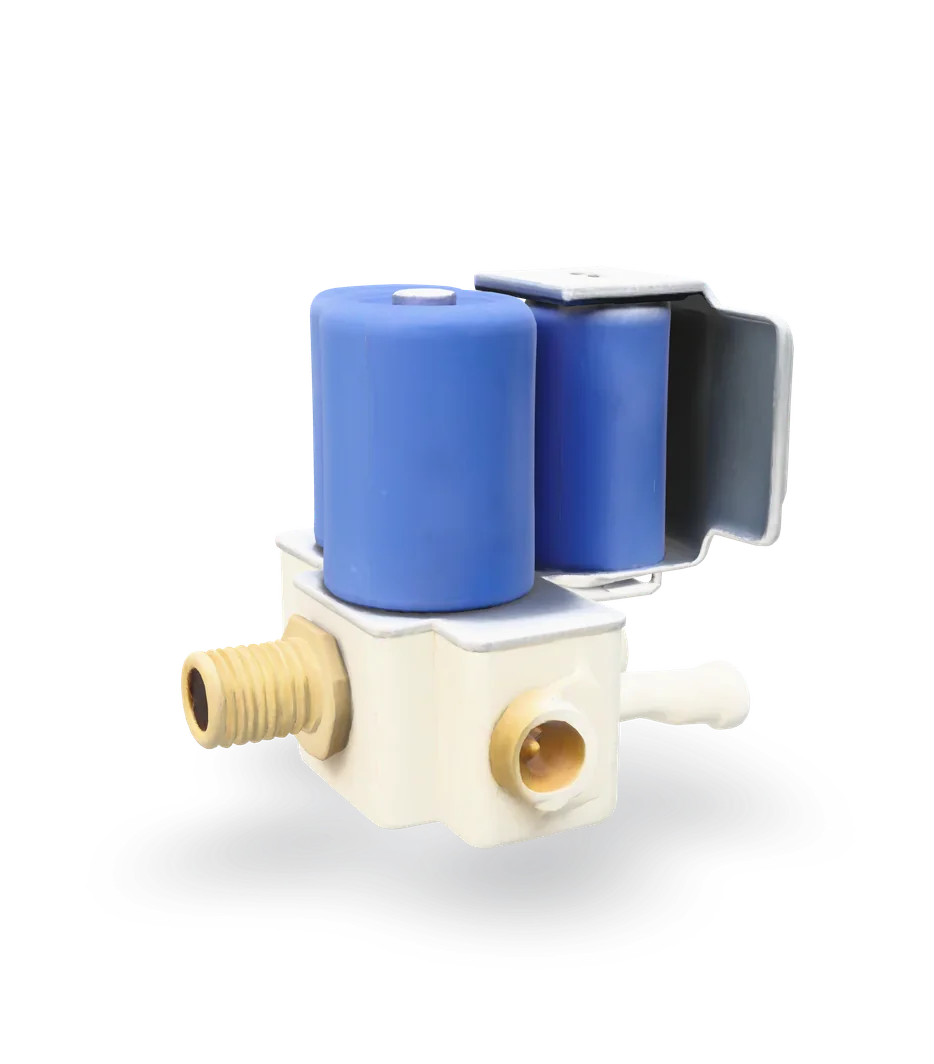
Refrigerator water inlet valve test and replacement
No water to the ice maker or the dispenser, or a drip at the back? The valve is a small block with one or two coils, and a meter tells you if a coil has died.
- Difficulty
- Easy
- Time
- 30 min–1 hr
- Typical part cost
- $20–$200Pro: $100–$250
- Tools
- 5See the list
Shut off the water, pull the refrigerator out and swap a part held by a bracket, a plug and two water connections.
What it does
What the water valve does
The household water line connects to the valve at the bottom back of the cabinet. Inside are one or more electric coils, each opening a path: one to the ice maker, and on dispenser models another to the water dispenser.
When a coil gets power, it pulls the valve open and water flows. When the power drops, it closes.
Why it fails
It can fail electrically, when a coil burns open and never opens the valve, or mechanically, when the valve sticks, clogs with sediment or cracks.
Low household water pressure can make a valve fill slowly even when it is healthy.
Symptoms
Signs of a bad water valve
No ice, no water
The ice maker stays empty and the dispenser gives nothing, though the supply valve to the refrigerator is open.
Full diagnosisWeak dispenser flow or small cubes
Water trickles out of the dispenser or the ice maker makes small, hollow cubes. A clogged filter does this too, so try that first.
Full diagnosisWater under the refrigerator
A drip or puddle at the bottom back, near where the water line connects, can be the valve's body or fittings.
Full diagnosisIce maker overfills
Water spills from the ice maker or freezes the cubes into one block. The valve may be sticking open.
Full diagnosis
How to test it
Test the water valve before you buy
- Unplug the refrigerator, pull it out and remove the rear access panel.
- Find the valve where the water line enters. Label its wires, then disconnect them. A dual valve has two coils and four wires.
- Touch the probes to the two terminals of one coil, then repeat for each coil.
A good coil typically reads
About 200–500 Ω on many valves (some read up to about 1,500 Ω)
Typical range. Check your part label or manual for the exact spec. The exact rating is sometimes printed on the valve itself. Use it if it is there.
- Good
- Every coil reads within the range for your valve. The coils are fine. If no water flows, check the supply, the filter and for a frozen line, or the control that powers the valve.
- Bad
- OL, or far outside the range on any coil. Replace the valve.
Safety first
Before you touch anything
- 1
Unplug the refrigerator
The valve coils run on household voltage. Unplug the refrigerator before you touch the valve or its wires.
- 2
Shut off the water
Close the supply valve that feeds the refrigerator, usually behind it, under the sink or in the basement. Keep a towel and a small bucket ready.
Tools you'll need
Grab these first
Tool and part links are affiliate links. We may earn a commission at no extra cost to you, and it never changes what we tell you to check first. How this works
- Nut driver1/4 in. hexRemoves the rear access panel and the valve's mounting screws.Typically $6–$15Shop this tool
- Adjustable wrench8–10 in.Loosens the water supply nut on the valve.Typically $10–$25Shop this tool
- Digital multimeterΩ, V, µF, µATests each coil in a minute.Typically $25–$60Shop this tool
- Bucket5 galCatches the water left in the line.Typically $4–$10Shop this tool
- HeadlampThe valve sits low at the back.Typically $12–$30Shop this tool
Step by step
How to replace the water valve
- 1
Power off, water off, pull it out
Unplug the refrigerator, close its water supply valve and pull it out from the wall.
- 2
Remove the rear access panel
Take out the screws around the lower rear panel and set it aside.
- 3
Disconnect the supply line
Hold a towel and bucket under the valve and loosen the nut on the incoming water line with a wrench. Let the line drain.
- 4
Label and unplug the wires
Photograph the wires on each coil, then pull them off. On a dual valve, label which coil feeds the ice maker and which the dispenser.
Pull the outlet tubes off the valve. Most push in and release with a collar; some have a nut or clip.
- 5
Remove the valve
Remove the screws holding the valve's bracket to the cabinet and lift the valve out.
- 6
Match the new valve
Check the number of coils, the outlet sizes, the inlet fitting and the bracket against the old valve.
Buy the part
Water inlet valve
Opens Amazon in a new tab. Where’s my model number?
What to look for
- Your model number. Valves differ in the number of coils, the fittings and the bracket.
- The part number on the old valve's label.
- The same number of coils: single for ice only, dual or more for ice and water.
- 7
Install and reconnect
Mount the new valve, push the outlet tubes fully home and reconnect the wires to match your photo.
Reconnect the supply line and snug the nut. Do not overtighten a plastic fitting.
- 8
Water on and check for drips
Open the water supply slowly and watch every connection for a minute. Fix any drip before you go on.
Refit the rear panel, plug the refrigerator in and push it back without kinking the line. Run the dispenser for a while to clear air.
Buy the part
Get the right replacement
Buy the part
Water inlet valve
Opens Amazon in a new tab. Where’s my model number?
What to look for
- Your model number. Valves differ in the number of coils, the fittings and the bracket.
- The part number on the old valve's label.
- The same number of coils: single for ice only, dual or more for ice and water.
Know your limits
When to call a pro
Stop and call a pro if
- The leak is in the household supply line or the shutoff valve in the wall or floor. That is plumbing.
- Water reaches the valve and the coils test good, but the valve never gets power.
- Water is getting into the floor or the cabinet under the refrigerator.
FAQ
Water inlet valve questions
Is it the valve or the filter?
A clogged filter slows the flow to both the dispenser and the ice maker. Replace the filter first. If one side works and the other does not, the valve's coil for that side is more likely.
My coil reads 1,200 Ω. Is it bad?
Not necessarily. Valve coils vary a lot by design, from about 200 Ω to over 1,000 Ω. Look for the rating printed on the valve or in your model's service sheet. A reading of OL means it is open.
Can I use the refrigerator without water hooked up?
Yes. Turn the ice maker off so it does not keep calling for water, and leave the water filter or bypass plug in place as your manual says.
Related
Keep going
- SymptomRefrigerator ice maker not making iceThe ice maker makes no ice, or only small, hollow cubes. Check the shut-off arm, the water supply and the freezer temperature first. After that, the water inlet valve and the ice maker itself are the parts that fail.Open guide
- SymptomRefrigerator leaking waterWater under the crisper drawers or on the floor in front usually means a clogged or frozen defrost drain. Water at the back, on models with ice and water, points to the water line, the inlet valve or the filter.Open guide
- Refrigerator partIce makerThe ice maker fills a mold with water, freezes it, drops the cubes into the bin and stops when the bin is full. A raised shut-off arm, a closed water valve or a warm freezer stop it just as surely as a failed unit.Open guide
- Refrigerator partDoor gasketThe door gasket is the soft magnetic seal around each door. When it tears, hardens or pulls away, warm air leaks in: you get condensation, frost near the door and a refrigerator that runs and runs.Open guide
Get the next fix before it breaks
A short email when the seasons turn: filters to change, detector batteries to check, and new repair guides. No spam, unsubscribe any time.
We send it with Kit. Privacy