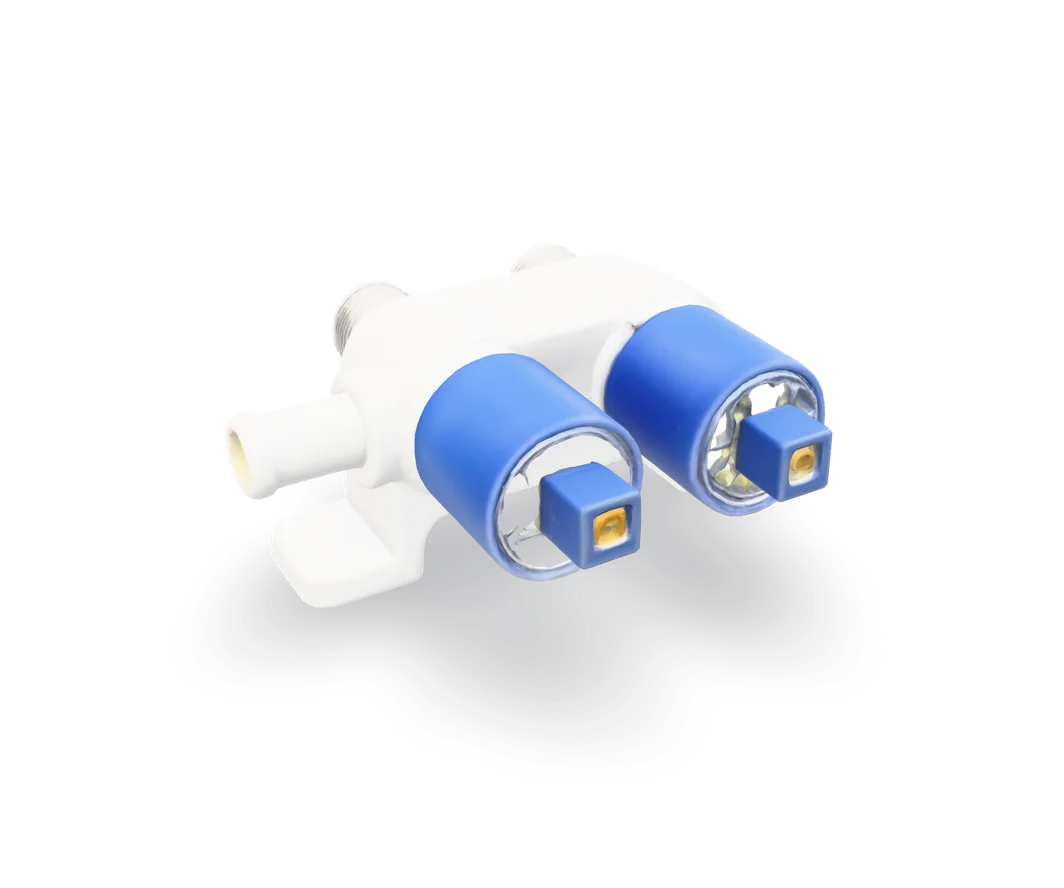
Washer water inlet valve: clean, test and replace
Slow fill, no fill, or only cold water? Start with the little screens where the hoses connect. Often that is the whole fix.
- Difficulty
- Easy
- Time
- 30 min–1 hr
- Typical part cost
- $15–$100Pro: $95–$300
- Tools
- 5See the list
Two hoses off, a panel or the console opened, a few screws and wires. Mostly about not spilling water.
What it does
What the inlet valve does
The inlet valve sits at the back of the washer where the fill hoses screw on. It has one electric coil, or solenoid, for each side, hot and cold. The control powers a coil and that side opens.
Small mesh screens inside the valve inlets catch grit and scale before it gets into the valve.
When the washer senses enough water, the control drops power and the valve snaps shut.
Why it fails
Hard water and grit clog the screens over time, so the washer fills slowly or not at all.
A coil can burn out. Then that side will not open, and you get only hot or only cold water, or no fill at all.
A worn seal inside can let water seep through when the washer is off. That slow trickle into the tub is a flood risk.
Symptoms
Signs of a bad inlet valve
Fills slowly or not at all
The washer hums along but the tub takes far longer to fill than it used to, or stays dry.
Full diagnosisOnly hot or only cold
One side never opens. A clogged screen or a dead coil on that side is the usual cause.
Full diagnosisFills when it is off
Water slowly creeps into the tub with the washer off. Close the supply valves until you replace the inlet valve.
Full diagnosisDrips at the back
A cracked valve body or a worn hose washer drips at the hose connections.
Full diagnosis
How to test it
Test the inlet valve before you buy
- Make sure both supply valves behind the washer are fully open, and that the fill hoses are not kinked.
- Unplug the washer, close both valves, and unscrew the fill hoses from the back of the washer into a bucket.
- Look into each inlet on the valve. Ease out any screen with needle-nose pliers and rinse it clean. Be gentle: on many valves the screens are not sold separately.
- Hold each hose over the bucket and briefly open its supply valve. You should get a strong flow.
- Good
- Clean screens and strong flow at both hoses. Refit everything and try a fill. If it fills normally now, you are done.
- Bad
- Weak flow from the hose means a house supply problem. Strong flow but still no fill points to the valve. Test the coils.
- Unplug the washer and reach the valve (steps 1 to 3 below).
- Pull the wires off one coil's two terminals. Note which wire went where.
- Touch one probe to each terminal. Repeat on the other coil.
A good coil typically reads
Often about 500–1,500 Ω
Typical range. Check your part label or manual for the exact spec. Readings vary by brand and model. Some valves read a few thousand ohms, and some electronic washers use low-voltage coils that read lower. Open or shorted is what matters most.
- Good
- A steady reading that matches the other coil, and the figure for your part, means the coil is intact.
- Bad
- OL (open) means that coil is dead. A reading near 0 Ω means it is shorted. Either way, replace the valve.
Safety first
Before you touch anything
- 1
Unplug the washer
Pull the plug before you touch the valve wires.
- 2
Close both supply valves
Turn the hot and cold valves behind the washer all the way off before you unscrew a hose.
Tools you'll need
Grab these first
Tool and part links are affiliate links. We may earn a commission at no extra cost to you, and it never changes what we tell you to check first. How this works
- Tongue-and-groove pliers10 in.Loosens the fill hose couplings if they are too tight to turn by hand.Typically $12–$28Shop this tool
- Needle-nose pliersPulls the inlet screens out without tearing them.Typically $8–$20Shop this tool
- Multi-bit screwdriverPhillips, flat, squareRemoves the console, rear panel and valve screws.Typically $10–$25Shop this tool
- Nut driver1/4 in. hexOptionalMany valve brackets use 1/4 in. hex screws.Typically $6–$15Shop this tool
- Digital multimeterΩ, V, µF, µATests each coil before you buy a new valve.Typically $25–$60Shop this tool
- Bucket5 galCatches the water left in the fill hoses.Typically $4–$10Shop this tool
Step by step
How to replace the inlet valve
- 1
Unplug and shut the water off
Pull the power plug and close both supply valves.
- 2
Unscrew the fill hoses
Hold a bucket under the back of the washer and unscrew both hoses from the valve. Keep track of which is hot and which is cold.
- 3
Open up to the valve
On many front loaders, take the screws out of the back edge of the top panel, slide it back and lift it off. Top loaders vary. On some you tilt the console back and lift the cabinet off. Your manual or a parts diagram shows which.
Hold the valve so it cannot drop into the cabinet, and take out the screws that hold it in place.
- 4
Unplug the coils and the hose
Photograph the wires, then pull them off the coils.
Release the clamp on the hose that runs from the valve into the washer, and pull the hose off. A little water may come out.
- 5
Swap the valve
Lift the old valve out. Check the new one matches: same number of coils, same outlets, same mounting.
Buy the part
Water inlet valve
Opens Amazon in a new tab. Where’s my model number?
What to look for
- The part listed for your washer's model number.
- The same number of coils and outlets, and the same mounting.
- 6
Install and reconnect
Set the new valve in place, put the screws back, and push the inside hose on with its clamp.
Put each wire back on the same terminal as in your photo.
- 7
Hoses on, test for leaks
Refit the panel. Screw the hoses back on by hand until the washer seats, then about two-thirds of a turn more with pliers. Do not overtighten. The valve is plastic. Hot goes to hot.
Open the supply valves and check for drips. Plug in and run a fill. Watch the back for leaks.
Buy the part
Get the right replacement
Buy the part
Water inlet valve
Opens Amazon in a new tab. Where’s my model number?
What to look for
- The part listed for your washer's model number.
- The same number of coils and outlets, and the same mounting.
Know your limits
When to call a pro
Stop and call a pro if
- The valve is new, the screens are clean, the hoses have strong flow, and the washer still will not fill. The pressure sensing or the control board may be at fault.
- Water comes in with the washer unplugged and the new valve fitted.
- A supply valve behind the washer is seized or leaking. That is plumbing, not the washer.
FAQ
Water inlet valve questions
Why does my washer only fill with cold water?
Check that the hot supply valve is open and the hot hose is on the hot inlet. Then clean the hot-side screen. If it still will not fill hot, test the hot coil.
Can I just clean the valve instead of replacing it?
You can clean the inlet screens. On most valves the coils and seals inside are not sold as separate parts, so a dead coil or a valve that leaks through means a new valve.
Should I replace the fill hoses at the same time?
If they are more than about five years old, yes. Several washer makers recommend replacing fill hoses every five years.
Related
Keep going
- SymptomWasher won't fill with waterThe tub stays dry, fills very slowly, or only gets hot or cold water. Check the supply valves, the hoses and the inlet screens, then test the inlet valve.Open guide
- SymptomWasher leaking waterA puddle under or behind the washer. Front leaks are usually the door seal or the pump filter. Back leaks are usually the fill hoses or the inlet valve. Find the spot first.Open guide
- Washer partFill hosesFill hoses carry water from the wall valves to the washer and are under pressure all the time. Several washer makers say to replace them every five years. Here is how to check and swap them.Open guide
- Washer partControl boardThe control board runs every step of the cycle and powers the pump, valve, lock and motor. It is the last part to suspect. When it is the cause, swap it plug by plug.Open guide
Get the next fix before it breaks
A short email when the seasons turn: filters to change, detector batteries to check, and new repair guides. No spam, unsubscribe any time.
We send it with Kit. Privacy