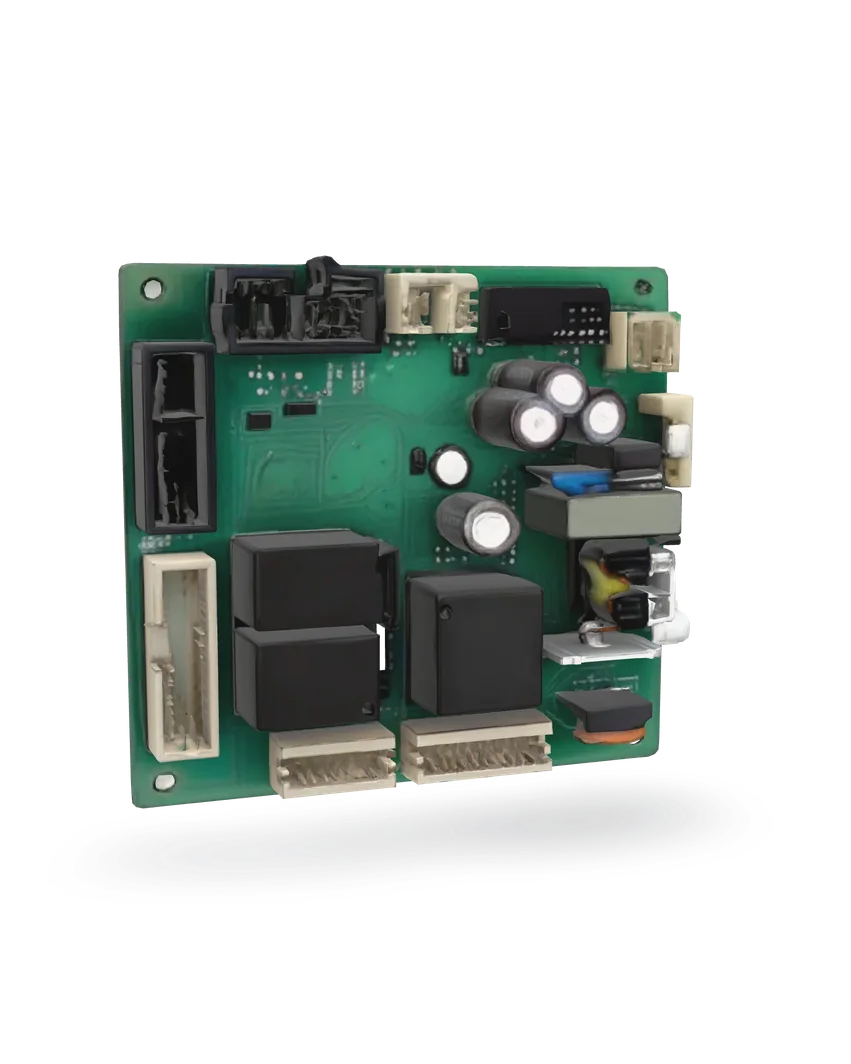
Heat pump water heater control board: check and replace
A blank display or a control fault code does not always mean a dead board. Check the cheap things first. If it is the board, it is a plug-and-screw swap with the power verified off.
- Difficulty
- Moderate
- Time
- 45 min–1.5 hr
- Typical part cost
- $140–$170Pro: $150–$700
- Tools
- 3See the list
Screws and plugs only, but every connector has to go back exactly where it was, on an appliance that usually runs on 240 V. Labeling each plug and verifying the power is dead are what make it safe.
What it does
What the control board does
The board reads the temperature sensors and decides how to heat the water: with the heat pump, with the backup elements, or both, depending on the mode you pick.
It switches power to the compressor, the fan and the elements, watches for faults such as a dirty filter or a blocked drain, and shows codes on the display.
Why it fails
Power events can damage the board, and the low-voltage parts around it, such as a fuse or a transformer, can fail too.
Connectors and the cable to the display can work loose over time. A loose plug can look exactly like a dead board.
Sometimes the board itself fails, and many units show a control or communication fault code when it does.
Symptoms
Signs of a bad control board
Display blank, breaker on
The breaker is on but the display stays dark and nothing runs. Rule out the breaker, any disconnect and loose plugs before you blame the board.
Full diagnosisControl or communication fault code
Many units show a code for a control board error or a lost link between the board and the display. Look it up in your manual.
A fault that will not clear
The heater shows a fault that comes straight back after a power reset, and the part the code points to checks out.
How to test it
Test the control board before you buy
- Turn the water heater's breaker off, or unplug it if it plugs into a wall outlet.
- Leave it off for a few minutes, then turn it back on.
- Watch the display as it starts up, and note any code it shows.
Many units wait a few minutes after the power comes on before the heat pump starts, up to about 5 minutes on some models.
- Good
- The display comes back and the code is gone. It may have been a one-off glitch. Keep an eye on it.
- Bad
- The display stays blank, or the same code returns. Do the visual check next.
- With the breaker off and the wiring tested dead (steps 1 to 3 below), look at the board.
- Press each connector firmly into its socket, including the cable to the display.
- Look for burn marks, melted plastic, swollen parts or water stains.
- Good
- Everything was seated and the board looks clean. If a plug was loose, power up and see if that fixed it.
- Bad
- Scorch marks, melted connectors or water damage. Replace the board, and find where any water came from first.
Safety first
Before you touch anything
- 1
Power off, then verify
Turn off the water heater's breaker, usually a double breaker. If your heater plugs into a wall outlet, unplug it. With the cover off, hold a voltage tester to the incoming power wires at the board before you touch it, after checking the tester on a working outlet. A dark display does not mean the power is off.
- 2
Hands off the refrigerant tubing
The board sits near the copper refrigerant tubes in the top section. Do not bend or lean on them. A damaged tube is a sealed-system repair for a certified pro.
Tools you'll need
Grab these first
Tool and part links are affiliate links. We may earn a commission at no extra cost to you, and it never changes what we tell you to check first. How this works
- Non-contact voltage testerPen styleConfirms there is no power at the board's incoming wires before you touch it. Most units run on 240 V.Typically $15–$30Shop this tool
- Multi-bit screwdriverPhillips, flat, squareOpens the top cover or control cover and removes the board's screws.Typically $10–$25Shop this tool
- Painter's tape and markerLabel every connector and its spot on the board before you unplug anything.Typically $5–$12Shop this tool
- HeadlampOptionalLets you read the board's labels and see into the connectors.Typically $12–$30Shop this tool
Step by step
How to replace the control board
- 1
Turn off the power
Turn off the water heater's breaker at the main panel, and the disconnect switch by the heater if there is one. If your heater plugs into a wall outlet, unplug it.
- 2
Open the cover
Remove the screws on the top cover or the control box cover, whichever covers the board on your model, and set it aside.
- 3
Check for power
Hold the voltage tester to the incoming power wires where they land on the board or its terminal block. It should stay quiet. If it beeps or lights, stop and find the right breaker.
- 4
Label every connector
Take clear photos of the board from a couple of angles. Then put a strip of tape with a letter or number on each plug and wire, and mark the same on the board.
- 5
Unplug the board
Unplug each connector by its plastic body, squeezing any locking tab. Never pull on the wires. Take off any wires held by screw terminals.
- 6
Remove the old board
Remove the screws or release the clips that hold the board, and lift it out by its edges.
- 7
Match the new board
Order the board by the model and serial number on the heater's rating label, not by how it looks. Compare the new board with the old one: the same connectors in the same places.
Some replacement kits come with new wire harnesses or a new display overlay. Use them as the kit's sheet says.
Buy the part
Heat pump control board
Opens Amazon in a new tab. Where’s my model number?
What to look for
- The board part number from your heater's parts list, looked up by its model and serial number.
- Whether the kit includes new wire harnesses or a display overlay that your model needs.
- A new board from the heater's maker. Boards are model specific.
- 8
Install it and reconnect
Set the new board in place and fasten it.
Reconnect every plug and wire to its labeled spot, matching your photos. Push each plug in until it seats fully.
- 9
Close it up
Check that no wire is pinched or touching the fan, then refit the cover and all its screws.
- 10
Power on and set it up
Turn the breaker back on, and the disconnect if there is one, or plug it back in.
Check the mode and the temperature setting and set them again if needed, as your manual shows.
Many units wait a few minutes before the heat pump starts. Then you should hear the fan, and the display should show no code.
Buy the part
Get the right replacement
Buy the part
Heat pump control board
Opens Amazon in a new tab. Where’s my model number?
What to look for
- The board part number from your heater's parts list, looked up by its model and serial number.
- Whether the kit includes new wire harnesses or a display overlay that your model needs.
- A new board from the heater's maker. Boards are model specific.
Know your limits
When to call a pro
Stop and call a pro if
- The breaker is on but there is no power at the heater at all. The problem is in the house wiring or the breaker, not the board.
- A new board shows the same fault. The cause may be a sensor, the wiring or the heat pump itself.
- You find scorched wires or a melted terminal block, not just a bad board.
- The heater is still under warranty. Check what it covers before you buy a board.
- You are not comfortable confirming that the wiring is dead before you touch it.
FAQ
Heat pump control board questions
How do I know it is the board and not something else?
Work from the cheapest check up. Make sure the breaker is on and any disconnect is closed, try a power reset, and reseat every connector. Look up any fault code, since many point to a sensor, the filter or the drain instead. Replace the board when power reaches the heater, the plugs are good, and it still will not run or show the right display.
Will I lose my settings with a new board?
Possibly. Check the mode and the temperature after the swap and set them again from your manual if they changed.
My display went blank after a storm. Is the board fried?
Maybe, but check the simple things first. Look for a tripped breaker, then try a power reset. A power event can also take out a small fuse or a transformer near the board, which a pro can check.
Related
Keep going
- SymptomWater heater not heating: no hot waterEvery hot tap runs cold. On an electric heater it is usually power, a tripped high-limit reset, an element or a thermostat. On a gas heater, start with the gas supply and the pilot.Open guide
- SymptomHeat pump water heater slow to recoverHeat pump water heaters only. The hot water runs out and takes a long time to come back. Check the operating mode, the air filter, the room's size and temperature, and the backup heating elements.Open guide
- Water heater partHeat pump evaporator fan motorHeat pump (hybrid) water heaters only. The evaporator fan in the top section pulls room air across the coil so the heat pump can take heat from it. When the fan fails, the heat pump cannot run. Most of these heaters run on 240 V, so the power goes off and stays off, verified with a tester.Open guide
- Water heater partHeat pump sealed systemHeat pump (hybrid) water heaters only. The sealed system is the closed refrigerant loop that moves heat from the room air into the tank: the evaporator coil, the compressor and the tubing. A leak or a failed compressor stops the heat pump, and any repair means opening the loop, which is certified work.Open guide
- Water heater partHeating elementElectric water heaters only. Two heating elements, one upper and one lower, heat the water. A burned-out element is the most common reason an electric water heater stops making hot water, and both test and replace the same way.Open guide
Get the next fix before it breaks
A short email when the seasons turn: filters to change, detector batteries to check, and new repair guides. No spam, unsubscribe any time.
We send it with Kit. Privacy