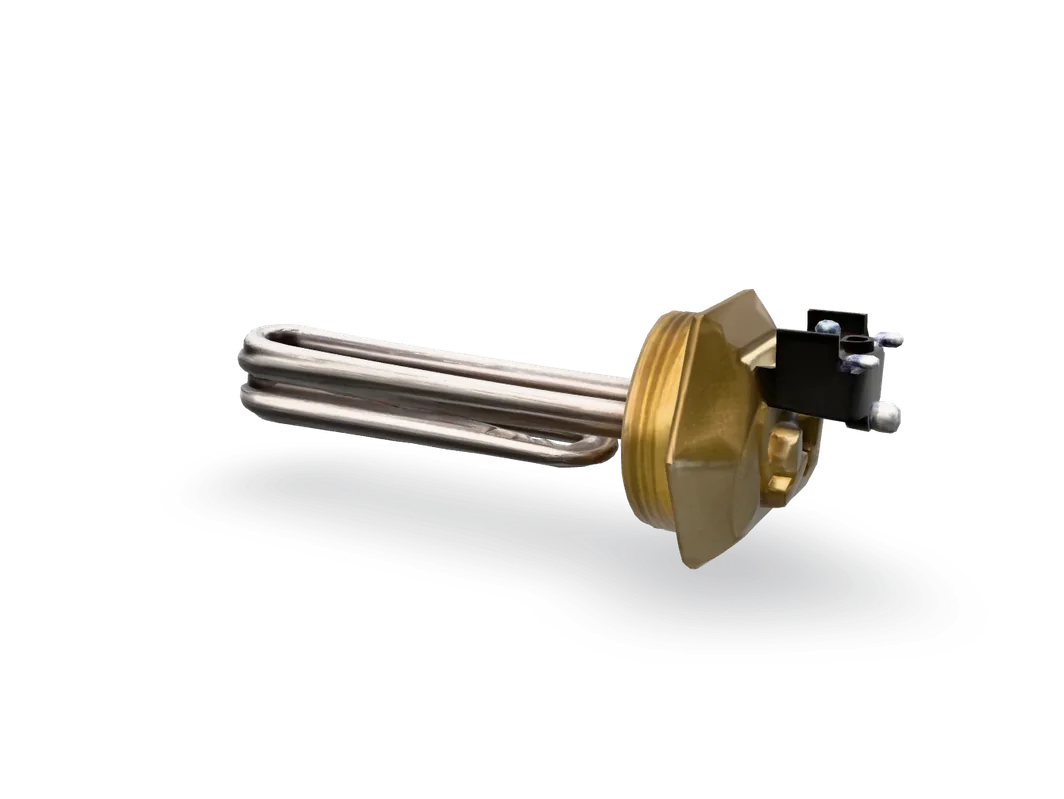
Water heater element replacement
Good news: an element is a cheap part and a very doable swap. The real work is draining the tank, and the one rule that matters is never turning the power back on until the tank is full.
- Difficulty
- Moderate
- Time
- 1 hr–3 hr
- Typical part cost
- $10–$60Pro: $150–$350
- Tools
- 6See the list
Two screws and a wrench, but you have to drain the tank below the element, handle 240 V wiring with the power verified off, and refill it properly. Plan on a couple of hours, mostly waiting on water.
What it does
What the element does
An electric water heater has two heating elements that poke through the side of the tank into the water, one near the top and one near the bottom. Each is a metal loop that gets hot when current runs through it, like the burner on an electric stove, but under water.
On most home heaters only one element runs at a time. The upper one heats the top of the tank first, so you get some hot water quickly. Then its thermostat hands power down to the lower element, which heats the rest.
Most home elements screw straight into the tank. Some older tanks use a bolt-on flange element held by four bolts instead. Gas water heaters have no elements at all.
Why it fails
Elements simply wear out. A failed element is the most common cause of an electric water heater not working right.
Hard water leaves scale and lime on the element. The crust traps heat against the metal, and the element runs hotter until it fails.
Dry firing kills elements fast. If the power comes on before the tank is full, the element sits in air, gets very hot within seconds and burns out. This is the usual reason a brand-new element dies right away.
Loose wire connections at the element terminals heat up and can burn the terminal or the wire.
Symptoms
Signs of a bad element
No hot water at all
If the upper element fails, the top of the tank never heats, and the lower element never gets its turn. Every tap runs cold.
Full diagnosisHot water runs out fast
If the lower element fails, the upper one still heats the top of the tank. You get a short burst of hot water, then it goes lukewarm or cold.
Full diagnosisThe breaker keeps tripping
An element that has shorted to the tank usually trips the water heater's breaker, sometimes the moment you switch it back on.
Full diagnosisThe reset button keeps popping
A grounded element is one of the usual reasons the red reset button above the upper thermostat trips.
How to test it
Test the element before you buy
- Turn off the water heater's breaker. Take off the access panel cover, fold back the insulation and remove the plastic safety cover over the element.
- Hold a voltage tester to both element terminal screws. It should stay quiet.
- Loosen the terminal screws and take both wires off the element. Take a photo first.
- Touch one probe to each element terminal screw. Polarity does not matter.
A good 240 V element typically reads
About 10–17 Ω (240 V, 3500–5500 W)
Typical range. Check your part label or manual for the exact spec. Work out your element's number from the label: volts times volts, divided by watts. A 4500 W, 240 V element works out to about 12.8 Ω. Test with the tank cool if you can, since a hot element reads a little different.
- Good
- A steady reading close to the number for your element's wattage means the heating wire is intact. Move on to the short-to-tank test.
- Bad
- OL or no reading means the element has burned open. Replace it.
- Keep the power off and both wires off the element.
- Touch one probe to one element terminal screw and the other to bare metal on the tank, such as the element's mounting flange or a clean spot near it.
- Repeat with the other terminal.
A good element reads
OL (no continuity to the tank)
Typical range. Check your part label or manual for the exact spec. The element must be disconnected for this test, or the meter reads through the wiring instead of the element.
- Good
- OL from both terminals. The element is not shorted to the tank.
- Bad
- Any reading or a beep from either terminal means the element is grounded. Replace it. A grounded element is a common reason for a tripping breaker.
Safety first
Before you touch anything
- 1
Breaker off, then verify
Turn off the water heater's double breaker at the panel. Then hold a voltage tester to the element terminals before you touch them. Try the tester on a working outlet first so you know it works. On a 240 V heater, part of the circuit can still be live at an element even when it is not heating, so do not rely on the dial or the thermostat.
- 2
Close the cold water supply
Close the shutoff valve on the cold water pipe that feeds the top of the tank before you drain anything.
- 3
Mind the hot water
Water in the tank can be hot enough to scald. Let it cool, or run hot water at a tap for a while, before you drain the tank or pull an element.
- 4
Drain below the element
Drain the tank until the water is below the element you are replacing. Water pours out of the opening otherwise.
Tools you'll need
Grab these first
Tool and part links are affiliate links. We may earn a commission at no extra cost to you, and it never changes what we tell you to check first. How this works
- Non-contact voltage testerPen styleConfirms there is no power at the element terminals before you touch them. These run on 240 V.Typically $15–$30Shop this tool
- Digital multimeterΩ, V, µF, µATests the element's resistance and checks it for a short to the tank before you buy anything.Typically $25–$60Shop this tool
- Multi-bit screwdriverPhillips, flat, squareOpens the access panel and loosens the element terminal screws.Typically $10–$25Shop this tool
- Water heater element wrench1-1/2 in.Screw-in elements take a 1-1/2 in. element wrench that fits over the hex at the element's base.Typically $7–$15Shop this tool
- Garden hoseDrains the tank from the drain valve to a floor drain or outside.Typically $15–$35Shop this tool
- Bucket5 galCatches the water that runs out when the element comes free.Typically $4–$10Shop this tool
- Work glovesOptionalProtects your hands from hot water and sharp panel edges.Typically $8–$20Shop this tool
Step by step
How to replace the element
- 1
Turn off the power
Turn off the water heater's breaker at the main panel. It is usually a double breaker labeled water heater or WH. If there is a disconnect switch next to the heater, turn that off too.
Careful. Leave the breaker off until the very last step. Powering an element that is not under water burns it out in seconds.
- 2
Open the access panel and check for power
Remove the screws on the access panel cover for the element you are working on and set the cover aside. Fold the insulation back, then unclip the plastic safety cover over the thermostat and element.
Hold the voltage tester to both element terminal screws and to the thermostat terminals. It should stay quiet. If it beeps or lights, stop and find the right breaker.
Tip. Not sure which element is bad? Run the resistance test and the short-to-tank test on both before you drain anything. Testing does not need the tank drained.
- 3
Shut off the water and drain below the element
Close the cold water shutoff above the tank. Open a hot water tap somewhere in the house so air can get in as the tank drains.
Attach a garden hose to the drain valve at the bottom of the tank and run it to a floor drain or outside. Open the valve.
For the upper element, you only need the level a little below it. The lower element sits near the bottom, so for that one you drain most of the tank.
Careful. The water coming out can be scalding hot. Keep the hose end secured and away from people and pets.
- 4
Take the wires off the element
Take a photo of the wiring. Loosen the two terminal screws and pull the wires off. Move them aside so they cannot touch anything.
- 5
Unscrew the old element
Fit the element wrench over the hex at the base of the element and turn it counterclockwise. A bolt-on flange element comes off by its four bolts instead.
Have the bucket ready. A little water usually runs out as the element comes free.
Tip. Lots of white crust on the old element? That is scale from hard water, and a tank flush is worth doing while it is drained.
- 6
Match the new element
Read the old element's stamp and the tank's rating plate. The new one must match the voltage and the wattage, and use the same mount: screw-in or bolt-on flange, with the same thread.
Use the new gasket that comes with it. Do not reuse the old one.
Careful. Never fit a higher wattage element than the rating plate allows. The wiring and breaker are sized for the original.
Buy the part
Heating element
Opens AppliancePartsPros in a new tab. Where’s my model number?
What to look for
- The same voltage and wattage as the old element. Both are stamped on the element and printed on the tank's rating plate.
- The same mount: most are 1 in. screw-in, some older tanks use a bolt-on flange.
- A new gasket in the box.
- In hard water, a low watt density element runs cooler and resists scale better.
Generic replacement elements are widely sold and fine to use as long as the voltage, wattage and mount match the original exactly.
- 7
Install the new element
Wipe the threads and the gasket seat on the tank clean.
Slip the new gasket onto the element and wet it with a little water. Thread the element in by hand, then snug it with the wrench. Firm is enough.
- 8
Reconnect the wires
Put the two wires back on the terminals as in your photo and tighten the screws firmly. Loose connections get hot.
- 9
Refill the tank and purge the air
Close the drain valve. Make sure a hot tap is still open in the house. Open the cold water shutoff all the way.
Let the tank fill. When water comes out of the hot tap, leave it running at full stream for a few minutes, until the flow is steady with no sputtering air. Then close the tap.
Check the new element for drips. If it weeps, snug it a little more.
Careful. The breaker stays off until the tank is completely full and the air is out. One dry start ruins the new element.
- 10
Close it up
Clip the plastic safety cover back on, fold the insulation back into place, and screw the access panel cover on.
- 11
Turn the power back on
Turn the breaker back on, and the disconnect switch if there is one.
Give the heater a couple of hours to heat a full tank before you judge the result.
Buy the part
Get the right replacement
Buy the part
Heating element
Opens AppliancePartsPros in a new tab. Where’s my model number?
What to look for
- The same voltage and wattage as the old element. Both are stamped on the element and printed on the tank's rating plate.
- The same mount: most are 1 in. screw-in, some older tanks use a bolt-on flange.
- A new gasket in the box.
- In hard water, a low watt density element runs cooler and resists scale better.
Generic replacement elements are widely sold and fine to use as long as the voltage, wattage and mount match the original exactly.
Know your limits
When to call a pro
Stop and call a pro if
- The breaker trips again with a new element in, or both elements test good and it still trips. The wiring or breaker may be the problem.
- You find scorched or melted wires, or a burned terminal block.
- The element will not budge, or the tank threads are damaged or corroded around the opening.
- Water is leaking from the tank itself, not just from around the element.
- You are not comfortable confirming that 240 V wiring is dead before you touch it.
FAQ
Heating element questions
Do I have to drain the whole tank?
No. Drain until the water is below the element you are replacing. For the upper element that is not much. For the lower one, near the bottom, it is most of the tank.
Can I test the element without draining?
Yes. Both tests on this page are done with the power off and the wires off the element. The water stays in the tank. Only drain once you know which element is bad.
Why did my new element burn out right away?
Almost always because the power came on before the tank was full. An element in air gets very hot within seconds and burns out. Refill completely and run a hot tap until the air is gone before you turn the breaker on.
Can I put in a bigger element for faster hot water?
No. Match the wattage on the rating plate. The wires and breaker are sized for it, and a bigger element can overload them.
Related
Keep going
- SymptomWater heater not heating: no hot waterEvery hot tap runs cold. On an electric heater it is usually power, a tripped high-limit reset, an element or a thermostat. On a gas heater, start with the gas supply and the pilot.Open guide
- SymptomWater heater not making enough hot waterThe shower starts hot and goes cold too soon, or the water is never more than warm. Check the temperature setting first, then the lower element and thermostat on electric units, the dip tube and sediment.Open guide
- SymptomElectric water heater keeps tripping the breakerElectric water heaters only. The water heater's breaker at the panel shuts off, by itself, again and again. A heating element shorted to the tank is one of the most common causes. Wiring, water on the wiring, or the breaker itself are the others.Open guide
- Water heater partWater heater thermostatElectric water heaters only. Two thermostats decide which element heats and when. The upper one also carries the red reset button, a safety cutoff that shuts everything off if the water gets too hot.Open guide
- Water heater partAnode rodThe anode rod wears away on purpose so the steel tank does not rust. Gas and electric tank heaters both have one. Check it every few years and replace it before it is down to the wire.Open guide
- Water heater partDrain valve and tank flushThe drain valve near the bottom of the tank lets you empty it and flush out sediment. Manufacturers suggest flushing gas and electric tanks about once a year, more often with hard water.Open guide