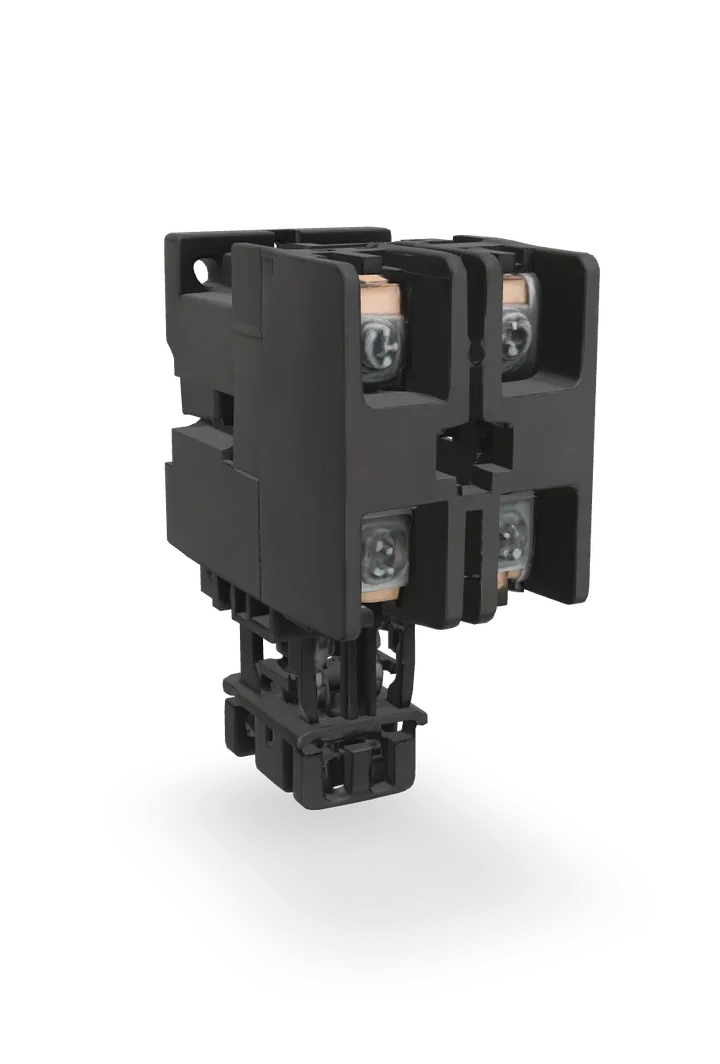
AC contactor test and replacement
If the indoor fan blows but the outdoor unit never starts, or the outdoor unit will not shut off, the contactor is a prime suspect. It is a switch, and switches wear out.
- Difficulty
- Moderate
- Time
- 30 min–1 hr
- Typical part cost
- $20–$100Pro: $150–$450
- Tools
- 6See the list
A few wires and two screws. The rating is for the high-voltage safety: proving the power is off and remembering that one leg can stay live on a single-pole contactor.
What it does
What the contactor does
When the thermostat calls for cooling, a 24 V signal reaches the contactor's coil. The coil becomes a magnet and pulls the contacts closed, sending 208 to 240 V to the compressor and the fan motor.
When the call ends, a spring pulls the contacts open again. Many residential units use a single-pole contactor, which switches only one of the two power legs. The other stays live inside the unit even when it is off.
Why it fails
Every start draws a spark across the contacts. Over years they pit and burn until they no longer carry power, or they weld themselves shut.
The coil can burn open, and insects or debris can jam the plunger.
Symptoms
Signs of a bad contactor
Indoor fan runs, outdoor unit silent
The thermostat calls for cooling, air blows inside, but nothing starts outside.
Full diagnosisOutdoor unit will not shut off
The outdoor unit keeps running after the thermostat is satisfied or turned off. Turn off the disconnect: welded contacts can freeze the indoor coil.
Full diagnosisBuzzing or chattering
A loud buzz or rapid clicking from the electrical corner of the unit when it should be starting.
Full diagnosisPitted or black contacts
With the power off and the panel open, the contact surfaces are pitted, burned or blackened.
How to test it
Test the contactor before you buy
- With the power off, proven off and the capacitor discharged (safety steps), look at the contactor through its window or around its sides.
- Look for pitting, burn marks, melted plastic, dead insects, or a plunger that is stuck down.
- Good
- Clean, flat contacts and a plunger that moves freely. Check the coil next.
- Bad
- Pitted, burned or blackened contacts, or a plunger stuck in. Replace the contactor.
- With everything off and discharged, pull one of the two thin low-voltage wires off the coil terminals.
- Probe the two coil terminals.
A good 24 V coil typically shows
A steady resistance reading, not OL
Typical range. Check your part label or manual for the exact spec.
- Good
- A steady reading means the coil is intact. If the contactor still never pulls in, the 24 V call may not be reaching it.
- Bad
- OL means the coil is open. Replace the contactor.
Safety first
Before you touch anything
- 1
Thermostat off, disconnect out, breaker off
Set the thermostat to off, pull or switch off the outdoor disconnect, and turn off the AC breaker in the main panel.
- 2
Prove both legs are dead
Test both incoming line terminals on the contactor with a voltage tester, checked first on a live outlet. On a single-pole contactor one leg stays connected all the time. Never work inside the disconnect box: its supply side is always live.
- 3
Discharge the capacitor
The capacitor is right beside the contactor and holds a charge. Discharge it with a resistor tool across C to HERM and C to FAN, and confirm 0 V.
Tools you'll need
Grab these first
Tool and part links are affiliate links. We may earn a commission at no extra cost to you, and it never changes what we tell you to check first. How this works
- Non-contact voltage testerPen styleConfirms both power legs are off before you touch the contactor.Typically $15–$30Shop this tool
- Capacitor discharge toolThe capacitor sits beside the contactor and holds a charge. Discharge it first.Typically $10–$25Shop this tool
- Digital multimeterΩ, V, µF, µAChecks the coil and confirms 0 V at the terminals.Typically $25–$60Shop this tool
- Nut driver1/4 in. hexRemoves the access panel and the contactor's mounting screws.Typically $6–$15Shop this tool
- Needle-nose pliersPulls the push-on terminals off cleanly.Typically $8–$20Shop this tool
- Multi-bit screwdriverPhillips, flat, squareLoosens the screw terminals on the line and load side.Typically $10–$25Shop this tool
Step by step
How to replace the contactor
- 1
Shut it all off
Thermostat off. Disconnect pulled or switched off. AC breaker off. Tape the breaker so no one turns it on.
- 2
Open the panel and test
Remove the electrical access panel. Hold your voltage tester to both incoming wires on the contactor; it must stay silent. Then confirm with your meter on AC volts: 0 V across the two incoming terminals, and from each one to the metal cabinet.
- 3
Discharge the capacitor
Bleed the capacitor with the discharge tool across C to HERM and C to FAN, then confirm 0 V with your meter.
- 4
Photograph and label every wire
Take clear photos of the contactor from two angles. Label each wire with tape: the two incoming line wires, the outgoing load wires to the compressor, fan and capacitor, and the two thin coil wires.
- 5
Remove the old contactor
Loosen the screw terminals and pull the push-on wires off, one wire at a time. Remove the two mounting screws and lift the contactor out.
- 6
Match the new contactor
Match the number of poles (single or double), the coil voltage (usually 24 V) and an amp rating at least as high as the old one and the unit's rating plate.
Buy the part
Contactor
Opens Amazon in a new tab. Where’s my model number?
What to look for
- The same number of poles as the old one: single-pole or double-pole.
- A 24 V coil, unless the old one is marked otherwise.
- An amp rating at least as high as the old contactor and the unit's rating plate.
Generic contactors are fine when the poles, coil voltage and amp rating match or exceed the old one.
- 7
Mount and wire it
Screw the new contactor in place. Move each wire to the same terminal position it had on the old one, one at a time, checking your labels and photos. Tighten the screw terminals firmly.
Tug each wire to make sure it is secure.
- 8
Close up and test
Refit the access panel, turn the breaker on, reinsert the disconnect and set the thermostat to cool.
The unit should start when the thermostat calls and stop when you turn the thermostat off.
Buy the part
Get the right replacement
Buy the part
Contactor
Opens Amazon in a new tab. Where’s my model number?
What to look for
- The same number of poles as the old one: single-pole or double-pole.
- A 24 V coil, unless the old one is marked otherwise.
- An amp rating at least as high as the old contactor and the unit's rating plate.
Generic contactors are fine when the poles, coil voltage and amp rating match or exceed the old one.
Know your limits
When to call a pro
Stop and call a pro if
- The contacts are welded or the unit will not shut off. Leave the disconnect off until a pro checks the indoor coil and the controls.
- A new contactor never pulls in. The 24 V signal from the thermostat or the indoor unit may be the problem.
- Wires are burned or melted, or the unit trips the breaker.
- You are not comfortable proving both power legs are off.
FAQ
Contactor questions
My outdoor unit will not turn off. What do I do?
Turn the thermostat off, then pull the outdoor disconnect or turn off the AC breaker. A contactor stuck closed keeps the unit running, which can freeze the indoor coil. Replace the contactor, or call a pro, before you use the AC again.
Can I clean pitted contacts instead of replacing them?
Not reliably. Contactors are not repaired; a pitted one is replaced. A new one is inexpensive.
Why is part of the unit still live with the thermostat off?
Many contactors switch only one power leg. The other leg stays connected inside the unit whenever the disconnect and breaker are on. That is why you always turn off the disconnect and breaker and test before touching anything.
Related
Keep going
- SymptomOutdoor AC unit won't turn onA silent outdoor unit is usually no power or no call. Check the thermostat, the AC breaker and the disconnect beside the unit. If they are fine and the unit still does not start, the contactor is a common culprit.Open guide
- SymptomOutdoor AC unit won't turn offIf the outdoor unit keeps running with the thermostat off, the contactor's contacts are probably welded shut. Pull the disconnect or turn off the breaker, because running nonstop can freeze the indoor coil. Then replace the contactor.Open guide
- SymptomAC humming but not startingWhen the outdoor unit hums but the fan and compressor do not start, the dual run capacitor is the most likely part. A contactor that buzzes or chatters can cause it too. If both test good, a seized compressor is the pro-only possibility.Open guide
- AC condenser partDual run capacitorThe dual run capacitor helps the compressor and the outdoor fan start and run. When it weakens, the unit hums without starting, the fan will not spin, or cooling fades. It is a few wires and one strap, but it must be discharged before you touch it.Open guide
- AC condenser partCondenser fan motorThe fan motor on top of the outdoor unit spins the blade that pulls air through the coil. When it fails, heat builds up, cooling stops and the compressor overheats. It hangs from the top grille, with a blade, a few bolts and a few wires.Open guide
- AC condenser partCompressorThe compressor is the large sealed dome inside the outdoor unit that pumps refrigerant between the indoor and outdoor coils. Testing and replacing it means working with refrigerant, which requires EPA certification, recovery equipment and brazing.Open guide
Get the next fix before it breaks
A short email when the seasons turn: filters to change, detector batteries to check, and new repair guides. No spam, unsubscribe any time.
We send it with Kit. Privacy