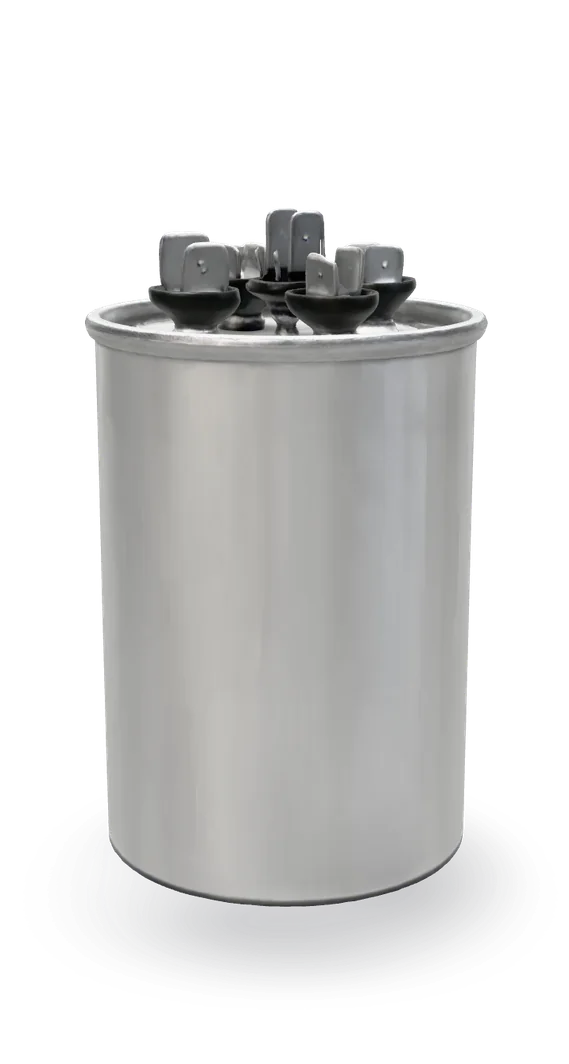
AC capacitor test and replacement
A common outdoor-unit failure, and one of the cheapest parts. It stores a dangerous charge, though, so the safety steps here are not optional.
- Difficulty
- Moderate
- Time
- 20–45 min
- Typical part cost
- $10–$60Pro: $80–$400
- Tools
- 6See the list
The swap itself is easy: a strap and three terminals. The rating is for the high-voltage safety: proving the power is off and discharging the capacitor before you touch it.
What it does
What the capacitor does
A dual run capacitor is two capacitors in one metal can. The larger section serves the compressor, the smaller one the outdoor fan motor. Its three terminals are marked C (common), HERM (the compressor) and FAN.
The label lists both ratings in microfarads, for example 45/5 µF, plus a voltage rating such as 370 or 440 VAC and a tolerance.
Why it fails
Capacitors lose capacity with age and heat. Most last many years, but a weak one can no longer give the motors the push they need.
A failing capacitor often bulges on top.
Symptoms
Signs of a bad capacitor
Humming, but nothing starts
You hear a hum from the outdoor unit but the fan does not turn and the compressor does not start.
Full diagnosisFan will not spin, or needs a push
The compressor hums but the fan sits still. Do not try to push-start it: a fan that only starts with a nudge is a sign of a weak capacitor.
Full diagnosisWarm air indoors
The indoor blower runs but the air is not cold, and the outdoor unit hums faintly or keeps stopping.
Full diagnosisBulged top or oily leak
With the power off and the panel open, the capacitor's top is domed instead of flat.
How to test it
Test the capacitor before you buy
- Listen at the outdoor unit while the thermostat calls for cooling. Note whether the fan turns and whether the compressor hums or runs.
- Do not reach into the unit, and keep sticks and fingers out of the fan.
- Good
- Fan turning and compressor running steadily. The capacitor is probably fine.
- Bad
- A hum with nothing turning, or the fan still while the compressor hums. Turn the thermostat off and go through the safety steps before testing.
- With the power off, tested and the capacitor discharged (steps below), photograph and remove the wires from its terminals.
- Probe C and HERM and read the value. Then probe C and FAN. Never probe HERM to FAN.
- Compare each reading with the rating printed on the label.
A good capacitor typically reads
Within about ±6% of each rating on its label
Typical range. Check your part label or manual for the exact spec.
- Good
- Both sections read within the tolerance on the label. The capacitor is fine; look at the contactor or the fan motor next.
- Bad
- Either section reads low or near zero, or the can is bulged or leaking. Replace it.
Safety first
Before you touch anything
- 1
Thermostat off, disconnect out, breaker off
Set the thermostat to off. Pull the disconnect handle or switch it off at the box beside the unit, then turn off the AC breaker in the main panel. There may be more than one disconnect.
- 2
Prove it is dead
Before you touch any wire, test at the unit with a voltage tester, checked first on a live outlet. A disconnect can fail and leave a leg live. The supply side of the disconnect stays live no matter what, so never work inside the disconnect box.
- 3
Discharge the capacitor
A capacitor holds its charge after the power is off, and its internal bleed resistor may have failed. Bleed it with a resistor discharge tool across C to HERM and C to FAN, then confirm 0 V on your meter. Never short the terminals with a screwdriver.
- 4
Glasses on
Wear safety glasses. A failing capacitor can spark as it discharges.
Tools you'll need
Grab these first
Tool and part links are affiliate links. We may earn a commission at no extra cost to you, and it never changes what we tell you to check first. How this works
- Non-contact voltage testerPen styleConfirms the power is off at the unit before you open the panel.Typically $15–$30Shop this tool
- Capacitor discharge toolBleeds the stored charge safely through a resistor before you touch the terminals.Typically $10–$25Shop this tool
- Digital multimeterΩ, V, µF, µANeeds a capacitance (µF) setting to test the capacitor, and a voltage setting to confirm 0 V after discharging.Typically $25–$60Shop this tool
- Nut driver1/4 in. hexRemoves the electrical access panel and the capacitor strap on most units.Typically $6–$15Shop this tool
- Needle-nose pliersPulls the push-on terminals off cleanly.Typically $8–$20Shop this tool
- Safety glassesA failing capacitor can spark when discharged.Typically $5–$15Shop this tool
Step by step
How to replace the capacitor
- 1
Shut it all off
Set the thermostat to off. At the outdoor unit, pull the disconnect or switch it off. Then turn off the AC breaker in the main panel.
Put tape over the breaker and tell the household so no one turns it back on.
- 2
Open the electrical panel
Remove the screws holding the electrical access panel, usually on the corner of the cabinet near where the refrigerant lines enter, and set it aside.
- 3
Test for voltage
Hold your voltage tester to the wires coming into the contactor. It should stay silent. If it beeps or lights, stop: the power is still on somewhere.
- 4
Discharge the capacitor
Clip the discharge tool's leads across C and HERM, then across C and FAN, holding only the insulated handles. Then set your meter to AC volts and confirm 0 V on both pairs.
Careful. Do not use a screwdriver to short the terminals. A charged capacitor can arc, burn and damage itself.
- 5
Photograph and label the wires
Take a clear photo of the capacitor's terminals showing which wire goes to C, HERM and FAN. Wrap a bit of tape on each wire marked with its terminal.
- 6
Remove the old capacitor
Pull each wire straight off its terminal with pliers. Loosen the strap or bracket and lift the capacitor out.
Read its label: both µF ratings and the voltage. You need those to buy the replacement.
- 7
Match the new capacitor
The new capacitor must have the same two µF ratings, and a voltage rating the same or higher. A 440 V capacitor can replace a 370 V one, but not the other way around.
Buy the part
Dual run capacitor
Opens Amazon in a new tab. Where’s my model number?
What to look for
- The two µF ratings on the old capacitor's label, for example 45/5. Both must match.
- A voltage rating the same as or higher than the old one, usually 370 or 440 VAC.
- A round or oval can that fits the unit's strap. Size matters less than the ratings.
Generic capacitors are fine as long as both µF ratings and the voltage rating match. You do not need the brand-name part.
- 8
Install and wire it
Set the new capacitor in the strap and tighten it. Push each wire firmly onto the matching terminal: C, HERM and FAN, exactly as in your photo.
Tug each wire gently to make sure it is seated.
- 9
Close up and power up
Refit the access panel. Turn the breaker on, reinsert the disconnect, and set the thermostat to cool.
Within a few minutes (many systems wait a few minutes before restarting), the fan should spin and the compressor should hum steadily.
Buy the part
Get the right replacement
Buy the part
Dual run capacitor
Opens Amazon in a new tab. Where’s my model number?
What to look for
- The two µF ratings on the old capacitor's label, for example 45/5. Both must match.
- A voltage rating the same as or higher than the old one, usually 370 or 440 VAC.
- A round or oval can that fits the unit's strap. Size matters less than the ratings.
Generic capacitors are fine as long as both µF ratings and the voltage rating match. You do not need the brand-name part.
Know your limits
When to call a pro
Stop and call a pro if
- You are not comfortable proving the power is off or discharging a capacitor.
- A new capacitor goes in and the compressor still hums without starting, or the breaker trips. The compressor may be seized.
- Wires or terminals in the unit are burned, melted or loose.
- The capacitor fails again within weeks. Something else is stressing it.
FAQ
Dual run capacitor questions
How do I know what capacitor to buy?
Read the label on the old one: two µF numbers and a voltage. Match both µF values exactly and use the same voltage or higher.
Is it safe for a homeowner to replace an AC capacitor?
Only if you follow every safety step. The power must be off and proven off, and the capacitor discharged with a proper tool and checked at 0 V. If any step makes you uneasy, call a pro: this is a short, inexpensive service call.
Can I use a higher-voltage capacitor?
Yes. A higher voltage rating is fine, for example 440 V in place of 370 V. The microfarad ratings must match.
My capacitor is not bulged. Can it still be bad?
Yes. Many weak capacitors look normal. The meter test tells you for sure.
Related
Keep going
- SymptomAC humming but not startingWhen the outdoor unit hums but the fan and compressor do not start, the dual run capacitor is the most likely part. A contactor that buzzes or chatters can cause it too. If both test good, a seized compressor is the pro-only possibility.Open guide
- SymptomAC condenser fan not spinningIf the outdoor fan will not spin, the capacitor is the most likely part, especially if the fan hums or starts with a nudge. If the capacitor is good and the blade is stiff or the motor smells burnt, replace the fan motor.Open guide
- SymptomAC running but not coolingIf the indoor fan blows but the air is warm, look at the outdoor unit. A fan that will not spin, a hum with nothing turning, or a coil packed with debris all stop the cooling. Ice on the lines points to a dirty filter first, and to low refrigerant if the filter is clean.Open guide
- AC condenser partContactorThe contactor is the heavy switch that turns the outdoor unit on when the thermostat calls for cooling. Burned contacts or a dead coil leave the unit silent. Welded contacts keep it running nonstop. It swaps out with a few wires and two screws.Open guide
- AC condenser partCondenser fan motorThe fan motor on top of the outdoor unit spins the blade that pulls air through the coil. When it fails, heat builds up, cooling stops and the compressor overheats. It hangs from the top grille, with a blade, a few bolts and a few wires.Open guide
- AC condenser partCompressorThe compressor is the large sealed dome inside the outdoor unit that pumps refrigerant between the indoor and outdoor coils. Testing and replacing it means working with refrigerant, which requires EPA certification, recovery equipment and brazing.Open guide
Get the next fix before it breaks
A short email when the seasons turn: filters to change, detector batteries to check, and new repair guides. No spam, unsubscribe any time.
We send it with Kit. Privacy