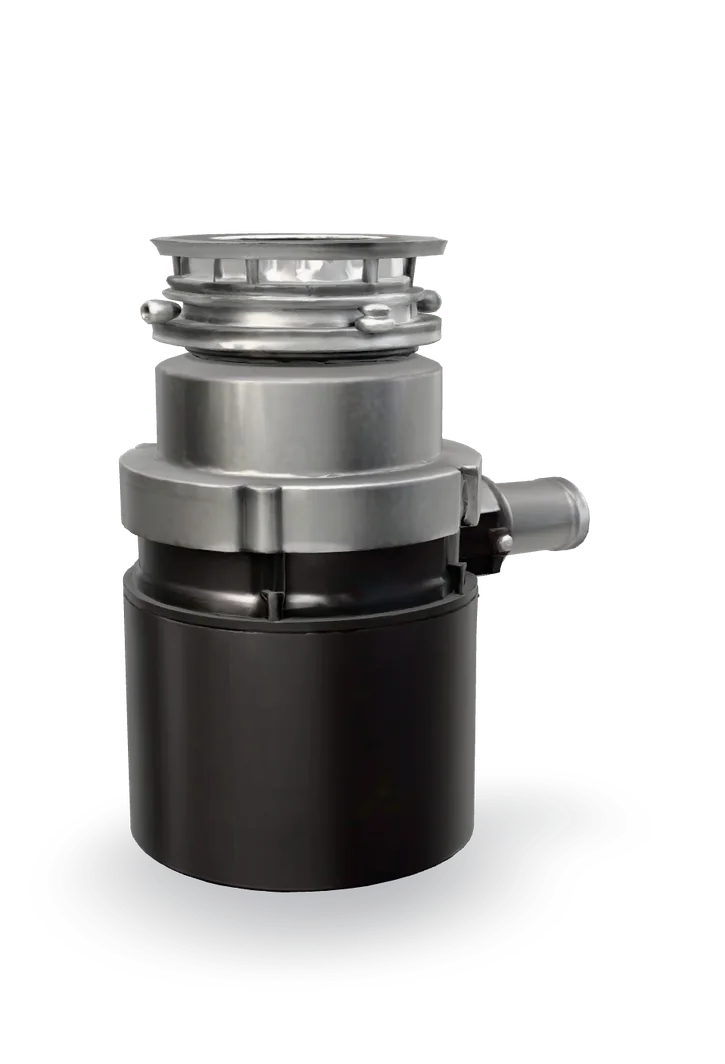
How to replace a garbage disposal
A cracked body, a leak from the bottom, or a motor that will not run means a new unit. If you match the mount, it often takes one to three hours.
- Difficulty
- Moderate
- Time
- 1 hr–3 hr
- Typical part cost
- $100–$300Pro: $200–$550
- Tools
- 6See the list
Heavy, awkward under-sink work with a little wiring. Easier when the new unit fits the same mount.
What it does
What the replace the unit does
The disposal body holds the motor, the flywheel and the grind ring in one sealed housing. It hangs from the mounting ring under the sink.
The body cannot be repaired once it cracks or its internal seals fail. That is when the whole unit is replaced.
Why it fails
Years of grinding and water wear through the internal seals or crack the housing. Water leaks from the bottom or the reset button.
The motor burns out or seizes, and freeing jams and resetting does not bring it back. The motor is sealed inside and is not a separate repair.
The grinding parts wear, so it grinds slowly and jams often.
Symptoms
Signs of a bad replace the unit
Leaks from the bottom
Water drips from the bottom of the body or from around the reset button. The seals or the housing have failed.
Full diagnosisDead after reset and unjam
It turns freely with the hex key, the reset is in, the outlet works, and it is still silent or just hums.
Full diagnosisConstant jams and slow grinding
It jams with normal use and grinds slowly. Worn grinding parts.
Full diagnosis
How to test it
Test the replace the unit before you buy
- Dry everything and run water with the disposal on for a few seconds. Watch with a light.
- Water from the top is the flange. From the side outlets, the elbow or dishwasher hose. From the body or the bottom, it is the unit.
- If it will not run, free any jam with the hex key, press the reset and check the outlet with a lamp.
- Good
- The leak is at the top or a side joint, or it runs after a reset. Fix that part instead.
- Bad
- It leaks from the body or bottom, or stays dead after all the checks. Replace the unit.
Safety first
Before you touch anything
- 1
Breaker off
Turn off the wall switch and the disposal's breaker. Unplug it if it is plug-in. If it is hardwired, check the wires with a voltage tester before you touch them, testing the tester on a live outlet before and after.
- 2
Support its weight
Disposals are heavy. Support the unit from below as it comes off, and lift with care.
Tools you'll need
Grab these first
Tool and part links are affiliate links. We may earn a commission at no extra cost to you, and it never changes what we tell you to check first. How this works
- Multi-bit screwdriverPhillips, flat, squareWorks the mounting ring, the cover plate and the hose clamp.Typically $10–$25Shop this tool
- Tongue-and-groove pliers10 in.Loosens the drain trap.Typically $12–$28Shop this tool
- Non-contact voltage testerPen styleConfirms the power is off before you touch any wires.Typically $15–$30Shop this tool
- Plumber's puttySeals a new sink flange, if you change the mount.Typically $4–$8Shop this tool
- Putty knifeStiff, 1-1/2 in.Scrapes off old putty.Typically $5–$12Shop this tool
- Bucket5 galCatches water from the trap and the old unit.Typically $4–$10Shop this tool
Step by step
How to replace the replace the unit
- 1
Switch off the power
Turn off the wall switch and switch off the breaker. Unplug a plug-in unit.
- 2
Disconnect the drains
Put the bucket under the disposal. Loosen the trap from the discharge tube with pliers, and take the dishwasher hose off the inlet if there is one.
- 3
Take the old unit down
Support the disposal from below. Turn its lower mounting ring to unhook it from the mount, and lower it onto a towel.
- 4
Move the power cord
Remove the cover plate on the bottom of the old unit and disconnect the cord. Wire it, or a new cord kit, into the new unit as its instructions show: neutral to white, hot to black, green ground to the green screw. Some newer models say to use only their own cord, so check first.
Hardwired: with the breaker off, test the wires with a voltage tester, then move the connections the same way through a proper cable clamp. If the wiring is different, or you are unsure, call an electrician.
- 5
Knock out the dishwasher plug
If a dishwasher drains into the disposal, remove the plug in the new unit's dishwasher inlet as its manual shows. On most units you knock it out with a screwdriver and a hammer. Take the plug out of the chamber.
- 6
Mount the new unit
If the new disposal uses the same mount, lift it onto the mounting ring and turn it until it locks. If not, fit its own mount and sink flange with fresh putty first.
Fit the discharge elbow with its gasket, line it up with the trap so the drain slopes down, and lock the unit in place.
Buy the part
Whole disposal unit
Opens Amazon in a new tab. Where’s my model number?
What to look for
- The same mount style as your old unit, if you want to keep the mounting ring and flange.
- Horsepower to suit your use. The label on the old unit shows its rating.
- Whether a power cord is included.
- 7
Reconnect and test
Tighten the trap nut and clamp the dishwasher hose on. Refit the cover plate.
Switch the breaker on, plug in, run water and switch it on. Check every joint for drips, then run the dishwasher to check its drain.
Buy the part
Get the right replacement
Buy the part
Whole disposal unit
Opens Amazon in a new tab. Where’s my model number?
What to look for
- The same mount style as your old unit, if you want to keep the mounting ring and flange.
- Horsepower to suit your use. The label on the old unit shows its rating.
- Whether a power cord is included.
Know your limits
When to call a pro
Stop and call a pro if
- There is no outlet under the sink and the disposal is not hardwired. A new circuit or outlet is electrical work.
- The drain pipes do not line up, or the trap and tailpiece need cutting and refitting.
- The wiring has no ground, or the switch or outlet is scorched.
FAQ
Whole disposal unit questions
How long does a garbage disposal last?
Often around 8 to 15 years, with about 12 a common average. Heavy use and not following the maker's use guidelines can shorten it.
Can I fix a disposal that leaks from the bottom?
Not in a lasting way. A leak from the bottom or the reset button usually means failed internal seals or a cracked housing. Replace the unit.
Do I need a new mount and flange?
Not if the new disposal is made to fit your existing mount. Otherwise fit the mount and flange that come with it, as in the sink flange guide.
Related
Keep going
- SymptomGarbage disposal leakingWater under the sink, traced to the disposal. Top leaks are the sink flange. Side leaks are the discharge elbow or the dishwasher hose. Bottom leaks mean the unit has failed inside.Open guide
- SymptomGarbage disposal won't turn onYou flip the switch and hear nothing at all. A tripped reset button is the first thing to check. A tripped breaker or GFCI, a loose plug, a bad cord or switch, or a dead motor come next.Open guide
- Garbage disposal partSink flange and mounting ringThe sink flange is the metal drain ring in the sink. Plumber's putty seals it, and the mounting ring underneath clamps it and holds the disposal. When the putty dries out or the bolts loosen, it leaks from the top.Open guide
- Garbage disposal partPower cordA plug-in disposal gets power through a cord wired into a small box on its bottom. A damaged cord, or a new disposal without one, needs a cord kit. Breaker off, three wires, cover on.Open guide
- Garbage disposal partDishwasher inlet and knockout plugDisposals have a small inlet on the side for the dishwasher drain hose. New units ship with a plastic plug inside it. Remove the plug, fish it out, and clamp the hose on tight.Open guide
Get the next fix before it breaks
A short email when the seasons turn: filters to change, detector batteries to check, and new repair guides. No spam, unsubscribe any time.
We send it with Kit. Privacy