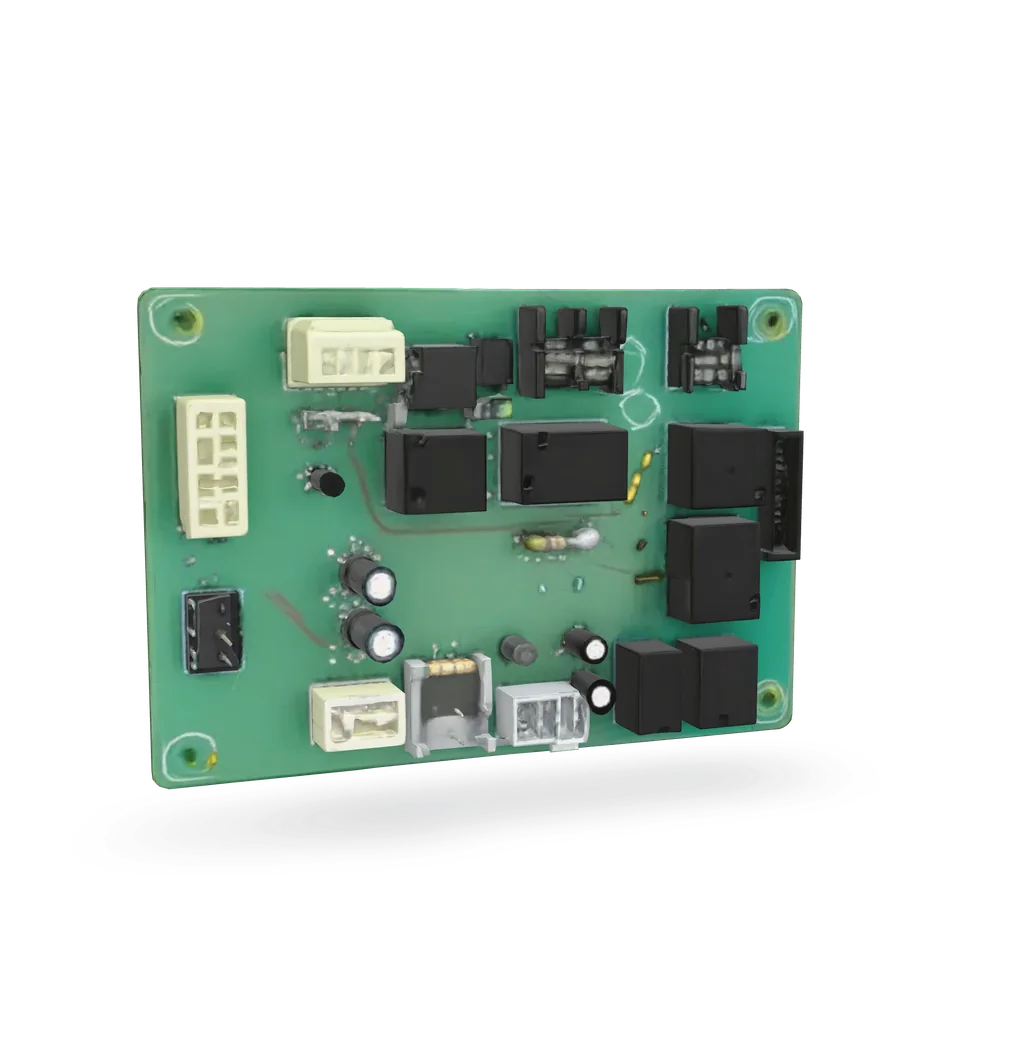
Tankless water heater control board: read the code, then replace
The board is the unit's brain, and it is also the part that reports everyone else's faults. Read the error code first. On an electric unit, swapping a bad board is a careful but doable job.
- Difficulty
- Moderate
- Time
- 30 min–1.5 hr
- Typical part cost
- $50–$200Pro: $400–$800
- Tools
- 3See the list
On an electric unit: a few screws and connectors, but the unit can be fed by up to four 240 V circuits, and every one has to be off and proven dead. On a gas unit the new board needs setup and gas checks, which is pro work.
What it does
What the control board does
Tankless gas and electric water heaters only. The control board sits behind the front cover with the wiring harness plugged into it. It runs the unit: it switches the heat on and off and talks to the temperature display.
When something goes wrong, the board stops the heat and shows an error code on the display. Some codes say the board itself has failed. Many more point at a sensor, a wire, the water flow or the gas supply that the board is only reporting on.
On a gas unit, the board is also set up for that unit's gas type, altitude and venting, using small switches or a program chip. Those settings decide how the burner fires.
Why it fails
Boards get blamed for faults they only report. A display that will not talk to the board, for example, can be a broken wire or a loose connector just as easily as a bad board.
Boards do fail outright. On some units a specific code means the board itself is bad, and the manual says so.
Symptoms
Signs of a bad control board
An error code that names the board
Some units show a code that means the control board has failed. Look the code up in your manual before you buy anything.
Full diagnosisA blank or frozen display
The power is on but the display is dark, or it shows a communication error. That can be a dead board, but check the wiring between the display and the board too.
No hot water and every other part checks out
The breakers are on, water is flowing, the elements or gas supply check out, and the unit still does not heat. The board becomes the suspect.
Full diagnosis
How to test it
Test the control board before you buy
- Leave the power on for now. Look at the unit's display, or the remote controller if it has one, and write down the code it shows.
- Find the code table in your owner's manual or on the label inside the front cover.
- Codes differ from one maker to the next, so only trust the table for your exact unit.
Write the code down before you turn anything off, so you have it for the code table and for a pro.
- Good
- A code that names a sensor, the flow, the water temperature or the gas supply points at that part, not the board. Start there.
- Bad
- A code that says the board has failed, or a display that stays dark with power confirmed on, makes the board a real suspect.
- Gas unit? Skip this check. Leave the cover on and give the code to the pro.
- With every breaker off and the power proven dead, take off the front cover.
- Look at the board without touching it. Check for scorch marks, melted connectors, corrosion or water stains.
- Check that each connector is pushed fully home. A loose plug can look exactly like a dead board.
- Good
- A clean board with tight connectors. Reseat each plug once and see if the fault clears before you buy a board.
- Bad
- Burn marks, melted plastic or corrosion mean the board is damaged. Water stains also mean a leak above it that needs fixing first.
Safety first
Before you touch anything
- 1
Every breaker off, then verify
Electric tankless units are fed by one to four double breakers, depending on size, and some have a disconnect switch too. Turn off every breaker and disconnect that serves the unit. Then prove it is dead with a voltage tester at the power terminals. Check the tester on a working outlet first.
- 2
Gas unit? Leave the board to a pro
On a gas tankless unit, the new board must be set for the gas type, altitude and venting, and the gas pressure is often checked with a gauge afterward. That is pro work. If you smell gas at any point, leave the house and call your gas utility from outside.
- 3
Mind the static
Touch bare metal on the cabinet to drain static before you handle either board, and hold boards by their edges.
Tools you'll need
Grab these first
Tool and part links are affiliate links. We may earn a commission at no extra cost to you, and it never changes what we tell you to check first. How this works
- Non-contact voltage testerPen styleProves every 240 V circuit feeding the unit is dead before you touch the board or the wiring.Typically $15–$30Shop this tool
- Multi-bit screwdriverPhillips, flat, squareOpens the front cover and removes the board's mounting screws.Typically $10–$25Shop this tool
- Painter's tape and markerLabel every connector and wire before it comes off the old board.Typically $5–$12Shop this tool
- HeadlampOptionalLights up small connector labels inside the cabinet with both hands free.Typically $12–$30Shop this tool
Step by step
How to replace the control board (electric tankless)
- 1
Write down the code, then turn off every breaker
Note the error code if there is one.
Turn off every breaker that feeds the water heater. Larger electric tankless units use two, three or four double breakers. Turn off the disconnect switch near the unit too, if there is one.
Careful. One breaker off is not enough. Each circuit feeds a different part of the unit, and any one left on can still shock you.
- 2
Take off the front cover
Remove the screws on the front cover and lift it off. On some units the display cable is attached to the cover, so ease it away and unplug that cable gently if your manual says to.
- 3
Prove the power is off
Check your voltage tester on a live outlet. Then hold it to the power wires at the unit's terminal block, one circuit at a time. It must stay quiet on every one.
If it beeps or lights on any circuit, stop. Find the breaker that is still on before you go further.
- 4
Photograph and label every connection
Take clear photos of the whole board, then close-ups of each connector. Put a strip of tape on each wire or plug and write where it goes.
Careful. Do not skip this. A plug on the wrong header can damage the new board the moment the power comes back.
- 5
Unplug the old board
Drain your static on bare cabinet metal. Then pull each connector straight off by its plastic body, not the wires. Squeeze any latch first.
- 6
Remove the old board
Remove the mounting screws or release the clips, and lift the board out by its edges.
- 7
Match the new board
Compare the part number on the old board, or the model list on the new one, with the model on your unit's rating plate. Boards are made for specific model families.
Read the sheet that comes with the new board. If it lists settings to make for your model, make them now.
Careful. Keep the new board in its bag until you are ready, and drain your static on the cabinet before you take it out.
Buy the part
Tankless control board
Opens Amazon in a new tab. Where’s my model number?
What to look for
- The part number printed on the old board. This is the surest match.
- Or your unit's model number from the rating plate. Boards are made for specific model families and sizes.
- For a gas unit, let the pro order it. The board has to match the gas type and be set up for your installation.
- 8
Mount the new board and plug it in
Fit the board on the same screws or clips.
Work through your labels and photos. Push each connector fully home on the same header it came from. Check that no wire is pinched.
- 9
Cover on, power on, test
Reconnect the display cable if you unplugged it, and screw the front cover back on.
Turn the breakers and disconnect back on. Open a hot tap and check the display and the water temperature.
Tip. A code right away? Turn every breaker off again and check your plugs against the photos before anything else.
Buy the part
Get the right replacement
Buy the part
Tankless control board
Opens Amazon in a new tab. Where’s my model number?
What to look for
- The part number printed on the old board. This is the surest match.
- Or your unit's model number from the rating plate. Boards are made for specific model families and sizes.
- For a gas unit, let the pro order it. The board has to match the gas type and be set up for your installation.
Know your limits
When to call a pro
Stop and call a pro if
- Your tankless unit is gas. The new board must be set up for the gas type, altitude and venting, and the gas pressure is often checked with a gauge.
- The board shows scorch marks or melted connectors. Something drew too much current, and that has to be found first.
- The new board shows the same code as the old one. The fault was somewhere else.
- You cannot find or prove dead every circuit that feeds the unit.
- You smell gas. Leave the house now and call your gas utility from outside.
FAQ
Tankless control board questions
How do I know the control board is the problem?
Read the error code and look it up in your manual. Suspect the board when the code says the board has failed, when the board is visibly damaged, or when everything it controls checks out and the unit still will not heat.
Can I replace the board on a gas tankless water heater myself?
We say no. On gas units the new board has to be set for your gas type, altitude and vent, and the manuals then have the gas pressure checked and adjusted with a gauge. Wrong settings can make the unit burn unsafely. That is a job for a qualified pro.
Why are there so many breakers for my electric tankless?
Big electric tankless units draw a lot of current, so they are split across two or more 240 V circuits, each on its own double breaker. Every one of them has to be off before you open the unit.
Will turning the power off and on clear the error?
It can clear a lockout so the unit tries again. Write the code down first. If the same code comes back, the fault is real and needs finding.
Related
Keep going
- SymptomTankless water heater showing an error codeTankless gas and electric water heaters only. The display shows a code and the hot water stops or comes and goes. Note the code, look it up in your manual, then check gas, water valves, the inlet filter and scale.Open guide
- SymptomWater heater not heating: no hot waterEvery hot tap runs cold. On an electric heater it is usually power, a tripped high-limit reset, an element or a thermostat. On a gas heater, start with the gas supply and the pilot.Open guide
- Water heater partTankless heating elementTankless electric water heaters only. The unit heats water as it flows through heating chambers, each with its own element. A burned-out element tests open on a meter and swaps out with the power and water off.Open guide
- Water heater partFlow sensorTankless gas and electric water heaters only. The flow sensor is a little turbine on the cold inlet that tells the control board water is moving. When it sticks or fails, the heater never fires, or cuts out mid-shower.Open guide
- Water heater partTankless igniter and flame rodTankless gas water heaters only. The igniter sparks the burner alight and the flame rod proves the flame is there. When either fails, the unit stops with an ignition or flame failure code. Service is pro work.Open guide
Get the next fix before it breaks
A short email when the seasons turn: filters to change, detector batteries to check, and new repair guides. No spam, unsubscribe any time.
We send it with Kit. Privacy