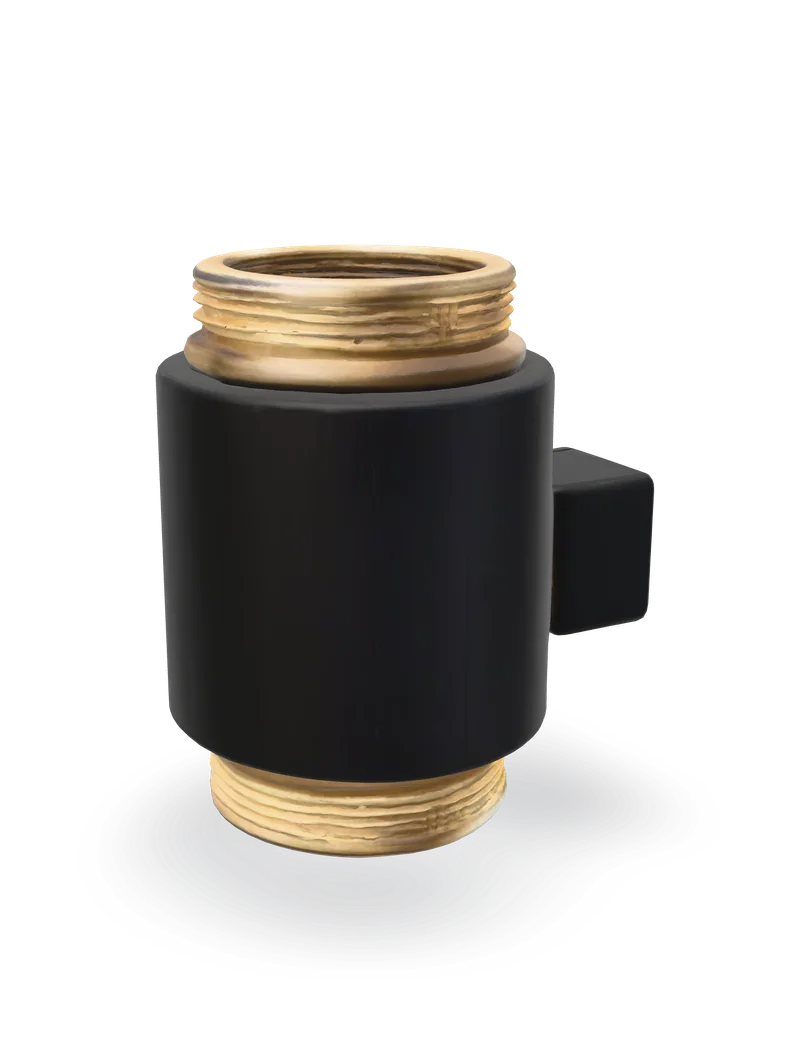
Tankless water heater flow sensor replacement
Good news: the flow sensor is a small plug-in part on the cold water inlet, and swapping it is mostly valves, a clip and a connector. Clean the inlet screen first, though. It fixes a lot of so-called bad sensors.
- Difficulty
- Moderate
- Time
- 45 min–1.5 hr
- Typical part cost
- $25–$65Pro: $100–$450
- Tools
- 4See the list
A connector, a clip or a couple of screws, and new O-rings. The care goes into the shutoffs, draining the unit, staying clear of the gas parts and, on electric units, confirming 240 V is dead.
What it does
What the flow sensor does
The flow sensor sits on the cold water inlet inside the heater. Water spins a small turbine with a magnet in it, and a sensor next to it counts the turns and sends pulses to the control board.
The board uses that signal to decide when to fire the burner or switch on the elements, and how hard. No flow, or flow under the heater's minimum, means no heat. The minimum is often around half a gallon a minute. Your manual has the number.
On an electric unit that minimum also protects the elements: they stay off until enough water is moving to carry the heat away.
Why it fails
Debris and mineral scale get into the turbine and jam it. A stuck turbine sends no pulses, so the board thinks no water is flowing.
A partly blocked turbine spins unevenly. The board gets a jumpy signal and the water temperature swings.
The magnet or the sensing element inside can fail, and the wires or connector between the sensor and the board can work loose.
Symptoms
Signs of a bad flow sensor
Hot tap open, heater never starts
Water runs, but the heater does not react at all: no fan, no burner, no elements. The board is not seeing any flow.
Full diagnosisA flow error code
Most heaters show a code for flow problems. Look yours up in the manual, then clean the inlet screen before you blame the sensor.
Full diagnosisCuts out mid-shower
The heater shuts down for no-flow now and then with the water still running.
Full diagnosisTemperature swings at a steady tap
A turbine that spins unevenly gives the board a jumpy reading, so the heat goes up and down.
How to test it
Test the flow sensor before you buy
- Make sure the cold isolation valve under the heater is fully open.
- Clean the inlet filter screen. See the inlet filter guide.
- Check the faucet aerator or showerhead you are testing at. Then open a hot tap wide and see if the heater fires.
- Good
- The heater fires and stays on. The sensor is fine. A clogged screen or restriction was holding the flow down.
- Bad
- Strong flow at the tap, a clean screen, and the heater still does not start or shows a flow code. The sensor is the next suspect.
- Open a hot tap and read the code on the heater's display or remote.
- Find it in the troubleshooting table in your manual. Codes differ from brand to brand.
- Good
- The code points somewhere else, such as gas supply, ignition or venting. Follow the manual for that code.
- Bad
- The manual ties the code to water flow or the flow sensor, and the screen and valves check out. Replace the sensor.
- Once the old sensor is out, look into its inlet for grit or scale on the turbine.
- On sensors where the turbine is reachable, blow gently through it.
The turbine is delicate. Do not poke it with tools.
- Good
- The turbine spins freely with no debris. If the codes were real, the sensing part has likely failed. Fit the new sensor.
- Bad
- It is jammed with debris or scale, or will not turn. On some models the turbine can be cleaned and refitted. On a sealed sensor, replace it.
Safety first
Before you touch anything
- 1
Power off, then verify on electric units
Gas units: unplug the heater or turn off its breaker. Electric units: turn off every breaker that feeds it, then check with a voltage tester at the power terminals before you touch anything inside. Try the tester on a working outlet first.
- 2
Gas units: close the gas shutoff
Turn the quarter-turn shutoff on the gas line so the handle sits across the pipe. Inside the cabinet, stay clear of the gas valve, burner and their tubes. You only work at the cold water inlet.
- 3
Close the valves and drain the unit
Close both isolation valves, then drain the water out of the heater through its drain plugs or service ports before you pull the sensor.
Tools you'll need
Grab these first
Tool and part links are affiliate links. We may earn a commission at no extra cost to you, and it never changes what we tell you to check first. How this works
- Multi-bit screwdriverPhillips, flat, squareTakes off the front cover screws and any screws holding the sensor.Typically $10–$25Shop this tool
- Non-contact voltage testerPen styleElectric units: confirms the power terminals are dead before your hands go inside. They run on 240 V.Typically $15–$30Shop this tool
- Needle-nose pliersPulls the metal retaining clip that holds the sensor in the inlet pipe.Typically $8–$20Shop this tool
- Bucket5 galCatches the water left in the heater when you drain it and pull the sensor.Typically $4–$10Shop this tool
- Painter's tape and markerOptionalLabels the sensor's connector so it goes back on the right socket.Typically $5–$12Shop this tool
- HeadlampOptionalThe sensor sits low in the cabinet, behind pipes and wiring.Typically $12–$30Shop this tool
Step by step
How to replace the flow sensor
- 1
Turn off the power
Gas unit: unplug the heater, or turn off its breaker if it is wired in. Electric unit: turn off every breaker that feeds it. Many have two or more.
- 2
Gas units: close the gas shutoff
Turn the quarter-turn handle on the gas line so it sits across the pipe. Electric unit? Skip this step.
Careful. That handle is the only gas part you touch on this job.
- 3
Close the isolation valves and drain the unit
Close the cold and hot isolation valves under the heater.
Drain the heater into a bucket: open its drain plugs if it has them, or the service port caps and handles on the isolation valves. Open a hot tap in the house to let air in.
- 4
Take off the front cover
Remove the screws around the front cover and lift it off. Set the screws somewhere safe.
Electric unit: hold the voltage tester to the power terminals where the house wires come in. It should stay quiet. If it lights or beeps, stop and find the breaker you missed.
Careful. On a gas unit, keep your hands off the gas valve, burner, igniter and their tubes and wires. You only work at the cold water inlet.
- 5
Find the sensor and unplug it
Follow the cold water line from the bottom of the heater up into the cabinet. The flow sensor sits on that inlet pipe, with a small wire harness running from it to the control board.
Take a photo of how it sits and which way it faces. Then press the latch and pull the connector off. Do not pull on the wires.
- 6
Pull the clip and remove the sensor
Pull out the metal retaining clip that holds the sensor in the pipe. Some models also use a few screws. Then ease the sensor straight out of the inlet.
Keep the bucket under it. A little more water will run out.
Tip. Note the flow direction arrow on the sensor body, if it has one. The new one has to face the same way.
- 7
Match the new sensor
Flow sensors are made for each brand and often each model. Order by your heater's model number. A sensor made for a different heater reads the flow wrong and can throw new codes.
Use the new O-rings that come with it.
Buy the part
Flow sensor
Opens Amazon in a new tab. Where’s my model number?
What to look for
- A sensor listed for your heater's exact model number. Brand-only matches are not enough.
- New O-rings in the box, or order them with it.
- On some models the turbine lives inside a larger water flow valve assembly, and that whole assembly is the part to order.
Avoid generic or universal flow sensors. They are calibrated for a particular heater, and a mismatched one reads the flow wrong and can cause new error codes.
- 8
Fit the new sensor
Check that the O-rings are seated in their grooves. Push the sensor into the inlet the same way the old one faced, then refit the clip and any screws.
- 9
Plug it back in
Push the connector onto the sensor until the latch clicks. Check your photo to make sure the wires run the way they did.
- 10
Water on and check for leaks
Close the drain plugs or service ports. Slowly open the cold and hot isolation valves. Watch the sensor for drips with the cover still off.
Let a hot tap run until the flow is steady and the air is out. If the sensor weeps, shut the water, drain it and reseat the O-rings.
Careful. Electric unit: the breakers stay off until the water runs steady with no sputtering, usually 3 to 5 minutes. Powering an element with air in its chamber can burn it out.
- 11
Cover on, gas and power back
Put the front cover back on with all its screws.
Gas unit: turn the gas shutoff handle back in line with the pipe. Then plug the heater in or turn its breakers on. Open a hot tap and check that it fires and the code is gone.
Buy the part
Get the right replacement
Buy the part
Flow sensor
Opens Amazon in a new tab. Where’s my model number?
What to look for
- A sensor listed for your heater's exact model number. Brand-only matches are not enough.
- New O-rings in the box, or order them with it.
- On some models the turbine lives inside a larger water flow valve assembly, and that whole assembly is the part to order.
Avoid generic or universal flow sensors. They are calibrated for a particular heater, and a mismatched one reads the flow wrong and can cause new error codes.
Know your limits
When to call a pro
Stop and call a pro if
- A new sensor did not fix it, or the code comes back. The wiring or the control board may be at fault.
- On your model the sensor is part of a water flow valve assembly with motors and gears, or it is buried behind gas parts.
- You are not comfortable confirming the 240 V supply to an electric unit is dead.
- The new sensor leaks after you reseat the O-rings, or the inlet pipe is cracked or corroded.
- You smell gas at any point. Leave the house and call the gas utility from outside.
FAQ
Flow sensor questions
How do I know it is the flow sensor and not the filter?
Clean the inlet screen and make sure the cold isolation valve is fully open first. Flow codes are very often a clogged screen. If the heater still will not fire with strong flow at the tap, the sensor is the next suspect.
Can I test a flow sensor with a multimeter?
Not in any practical way at home. The checks in service manuals are voltage readings taken with the heater powered and running, which is technician work. Use the error code, the screen check and a look at the turbine instead.
Can I clean the flow sensor instead of replacing it?
Sometimes. On some models the turbine can be taken out, cleaned of debris and checked that it spins freely. Many sensors are sealed, though, and those get replaced.
Why does my heater only fire with the tap wide open?
Every tankless heater needs a minimum flow to start, often around half a gallon a minute. A sticky turbine, a clogged screen or a restricted fixture can keep a gentle flow under that minimum.
Related
Keep going
- SymptomTankless water heater: no hot water at low flowTankless gas and electric water heaters only. Hot water works at full flow but not at a trickle or at one low-flow fixture. The flow is below the heater's minimum activation flow, or something is cutting flow.Open guide
- SymptomTankless water heater showing an error codeTankless gas and electric water heaters only. The display shows a code and the hot water stops or comes and goes. Note the code, look it up in your manual, then check gas, water valves, the inlet filter and scale.Open guide
- SymptomTankless water heater goes hot, cold, then hot againTankless gas and electric water heaters only. The shower runs hot, turns cold for a few seconds, then hot again, often after you shut the water off and turn it back on. Check flow, the fixture and the filter.Open guide
- Water heater partInlet filter screenTankless gas and electric water heaters only. A small mesh screen at the cold water inlet catches grit before it reaches the flow sensor and heat exchanger. When it clogs, hot water flow drops and the heater can stop firing.Open guide
- Water heater partTankless control boardTankless gas and electric water heaters only. The control board runs the unit and shows error codes. On electric tankless units a board swap is DIY with every breaker off. On gas units, a pro sets up the new board.Open guide
- Water heater partDescaling flushTankless gas and electric water heaters only. Hard water leaves scale inside the heat exchanger or heating chambers. A yearly flush with a pump and descaling solution through the isolation valves' service ports dissolves it.Open guide
Get the next fix before it breaks
A short email when the seasons turn: filters to change, detector batteries to check, and new repair guides. No spam, unsubscribe any time.
We send it with Kit. Privacy