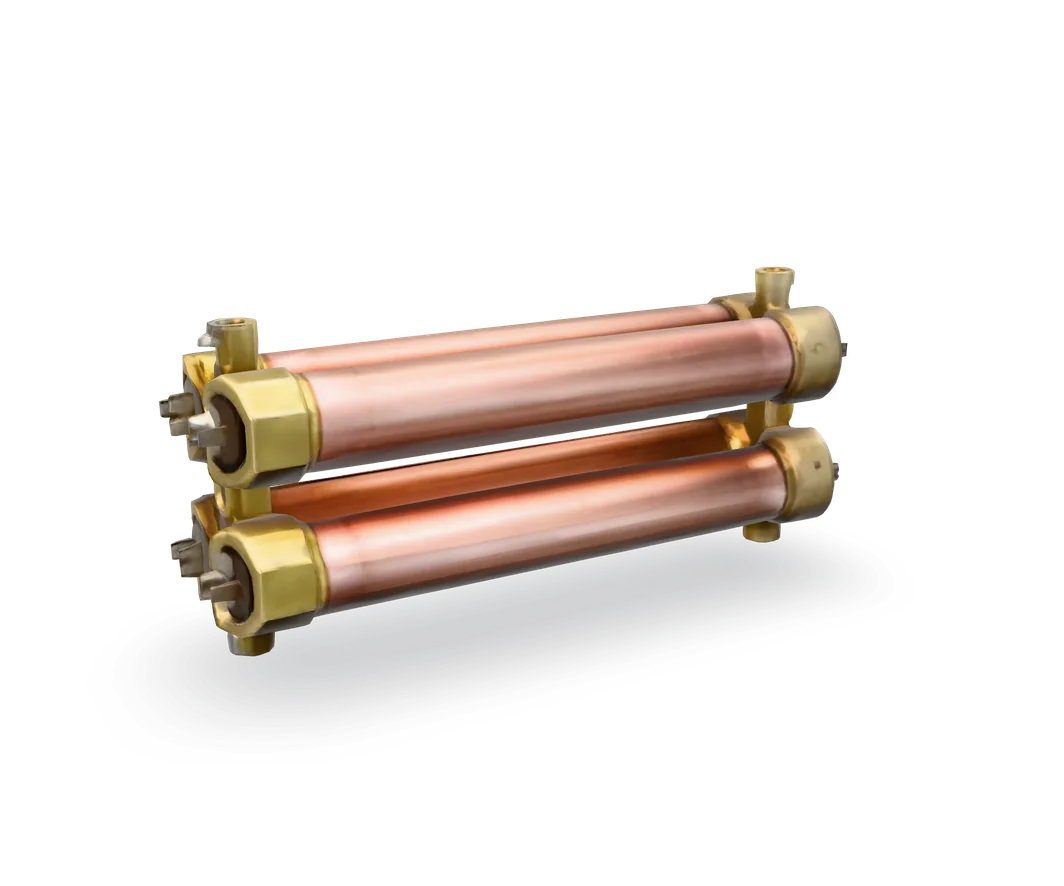
Electric tankless water heater element: test and replace
Good news: each element is one part in one chamber, and a meter tells you which one is bad. The one rule that matters is getting every bit of air out before the power goes back on.
- Difficulty
- Moderate
- Time
- 45 min–2 hr
- Typical part cost
- $20–$80Pro: $200–$800
- Tools
- 6See the list
Not many parts, but the unit runs on several 240 V circuits that must all be off and proven dead, and you must purge every bit of air before the power goes back on.
What it does
What the element does
Tankless electric water heaters only. Instead of a tank, the unit has a set of heating chambers that the water flows through. Each chamber holds one heating element, and larger units have three or more.
Not every unit is built this way. Some use a single heating block that is sold and replaced as one assembly. This guide is for units with separate screw-in elements, so check your manual or parts list first.
Each element is a metal heating loop that gets hot when current runs through it. The elements are rated in kilowatts and volts, for example 9 kW at 240 V, and that rating is printed on the element and the unit's label.
The elements only work when they are under water. With water around them, the heat goes straight into the water. In air they overheat in seconds.
Why it fails
Dry firing is the classic killer. If the power comes on while there is still air in a chamber, the element in that chamber overheats and burns out. Manufacturers warn this can permanently damage the elements.
Air gets in whenever the water supply has been shut off or the unit has sat unused. Air pockets left in the chambers can make the elements burn out early.
Like any heating element, they also simply wear out, and an element that has burned open reads as an open circuit on a meter.
Symptoms
Signs of a bad element
No hot water, or not hot enough
An electric tankless unit that runs but will not heat the water is a reason to test the elements. Check the breakers and the error code first.
Full diagnosisIt quit after the water was shut off
Trouble right after a water shutoff, a plumbing repair or a long time unused often means air got into a chamber and an element dry fired.
An element reads open on the meter
OL or no reading across an element's two terminals means it has burned open. That is the one to replace.
An error code on the display
Many units show a code when they cannot heat. Look it up in your manual before you take anything apart.
Full diagnosis
How to test it
Test the element before you buy
- Turn off every breaker that feeds the unit. Take off the front cover and prove the power is dead with a voltage tester at each element's terminals.
- Photograph the wiring, then take both wires off the element you are testing.
- Touch one probe to each of that element's two terminals. Polarity does not matter.
- Repeat for each element, one at a time.
A good 240 V element typically reads
About 6–11 Ω (240 V, 5.5–9 kW)
Typical range. Check your part label or manual for the exact spec. Work out the number for your element from its label: volts times volts, divided by watts. A 9,000 W, 240 V element works out to about 6.4 Ω. If your unit runs on 208 V or uses a different wattage, use those numbers instead.
- Good
- A steady reading close to the number for your element's rating means it is intact. Test the next one.
- Bad
- OL or no reading means the element has burned open. Replace that element.
Safety first
Before you touch anything
- 1
Every breaker off, then verify
Electric tankless units are fed by one to four double breakers, depending on size, and some have a disconnect switch too. Turn off every one that serves the unit, then prove the element terminals are dead with a voltage tester. Check the tester on a working outlet first.
- 2
Shut off the water
Close the cold water shutoff to the unit before you open anything on the water side.
- 3
Purge the air before power
After the job, run water through the unit until every bit of air is out, before any breaker goes back on. Powering an element with air in its chamber can burn it out.
Tools you'll need
Grab these first
Tool and part links are affiliate links. We may earn a commission at no extra cost to you, and it never changes what we tell you to check first. How this works
- Non-contact voltage testerPen styleProves every circuit feeding the unit is dead before you touch the element terminals. These run on 240 V.Typically $15–$30Shop this tool
- Digital multimeterΩ, V, µF, µAReads each element's resistance so you replace only the one that has failed.Typically $25–$60Shop this tool
- Multi-bit screwdriverPhillips, flat, squareOpens the front cover and loosens the element terminal screws.Typically $10–$25Shop this tool
- Adjustable wrench8–10 in.Some elements unscrew with a wrench. Check your manual for the fitting on your unit.Typically $10–$25Shop this tool
- Painter's tape and markerLabel the element wires before they come off.Typically $5–$12Shop this tool
- Bucket5 galCatches the water left in the chamber when the element comes out.Typically $4–$10Shop this tool
Step by step
How to replace the element
- 1
Turn off every breaker
Turn off every breaker that feeds the water heater. Larger electric tankless units use two, three or four double breakers. Turn off the disconnect switch near the unit too, if there is one.
Careful. Leave every breaker off until the very last step, after the air is purged. One dry start ruins a new element.
- 2
Open the cover and prove it is dead
Remove the front cover screws and lift the cover off.
Check your voltage tester on a live outlet. Then hold it to the terminals of every element. It must stay quiet on all of them. If it beeps or lights, stop and find the breaker that is still on.
- 3
Find the bad element
Run the resistance test on each element with its wires off. Note which one reads open.
Leave the water on while you test. You only need it off to take an element out.
- 4
Shut off the water and relieve the pressure
Close the cold water shutoff to the unit. Close the hot side isolation valve too, if your unit has one.
Open a hot tap to let the pressure out. Set the bucket and a towel under the element you are changing.
- 5
Take the wires off the element
Photograph the wiring and label each wire. Loosen the terminal screws or nuts and move the wires aside so they cannot touch anything.
- 6
Remove the old element
Unscrew the element from its chamber the way your manual shows. Fittings differ between units, so check the size and direction before you put a wrench on it.
Expect some water to run out as it comes free.
- 7
Match the new element
Read the old element's stamp and the unit's rating label. The new element must match the voltage and the wattage, and fit the same chamber.
Use the new O-ring or seal that comes with it. Do not reuse the old one.
Careful. Never fit a higher wattage element than the label allows. The wiring and breakers are sized for the original.
Buy the part
Tankless heating element
Opens Amazon in a new tab. Where’s my model number?
What to look for
- The same voltage and wattage as the old element. Both are stamped on the element and printed on the unit's label.
- An element listed for your unit's model. Elements are made for specific model families.
- A new O-ring or seal in the box.
Compatible elements from other makers are sold for many units. They are fine only if the voltage, wattage and fit match the original exactly.
- 8
Fit the new element
Wipe the seat in the chamber clean. Fit the new seal, start the element by hand and snug it the way your manual says. Firm is enough.
- 9
Reconnect the wires
Put each wire back on its terminal as in your photo and tighten firmly. Loose connections get hot.
- 10
Turn the water on and purge the air
Close the hot tap you opened. Open the isolation valves slowly and check the new element for drips.
Then open one or more hot taps and let the water run for 3 to 5 minutes, until it flows steady with no spitting or sputtering. That pushes the air out of every chamber. Your manual may give a different time, so follow it.
Careful. The breakers stay off until the air is out. Powering an element with air in its chamber can damage it permanently.
- 11
Cover on, then power on
Screw the front cover back on.
Turn the breakers and the disconnect back on. Open a hot tap and check the water heats.
Buy the part
Get the right replacement
Buy the part
Tankless heating element
Opens Amazon in a new tab. Where’s my model number?
What to look for
- The same voltage and wattage as the old element. Both are stamped on the element and printed on the unit's label.
- An element listed for your unit's model. Elements are made for specific model families.
- A new O-ring or seal in the box.
Compatible elements from other makers are sold for many units. They are fine only if the voltage, wattage and fit match the original exactly.
Know your limits
When to call a pro
Stop and call a pro if
- A new element burns out again soon after the swap. Something is letting air into the chambers or the water flow is wrong.
- Every element tests good and the unit still will not heat. The fault is elsewhere, often the board or a sensor.
- You cannot find or prove dead every circuit that feeds the unit.
- You find scorched or melted wires or terminals.
- The chamber or its fitting is cracked or leaks around a new element.
FAQ
Tankless heating element questions
Why did my new element burn out right away?
Almost always because the power came on with air still in a chamber. Run hot taps for several minutes after any water shutoff, until the flow is steady, and only then turn the breakers on.
Do I have to replace all the elements?
No. Test each one. Only an element that reads open, or far off the number for its rating, needs replacing.
What resistance should a tankless element read?
Work it out from the label: volts times volts, divided by watts. At 240 V, a 9,000 W element is about 6.4 Ω and a 5,500 W element about 10.5 Ω. Check your element's label or your manual.
Is a gas tankless the same?
No. A gas tankless unit has no elements. It heats with a burner, and that is pro work. See the burner and gas valve page.
Related
Keep going
- SymptomWater heater not heating: no hot waterEvery hot tap runs cold. On an electric heater it is usually power, a tripped high-limit reset, an element or a thermostat. On a gas heater, start with the gas supply and the pilot.Open guide
- SymptomTankless water heater showing an error codeTankless gas and electric water heaters only. The display shows a code and the hot water stops or comes and goes. Note the code, look it up in your manual, then check gas, water valves, the inlet filter and scale.Open guide
- Water heater partTankless control boardTankless gas and electric water heaters only. The control board runs the unit and shows error codes. On electric tankless units a board swap is DIY with every breaker off. On gas units, a pro sets up the new board.Open guide
- Water heater partFlow sensorTankless gas and electric water heaters only. The flow sensor is a little turbine on the cold inlet that tells the control board water is moving. When it sticks or fails, the heater never fires, or cuts out mid-shower.Open guide
- Water heater partInlet filter screenTankless gas and electric water heaters only. A small mesh screen at the cold water inlet catches grit before it reaches the flow sensor and heat exchanger. When it clogs, hot water flow drops and the heater can stop firing.Open guide
Get the next fix before it breaks
A short email when the seasons turn: filters to change, detector batteries to check, and new repair guides. No spam, unsubscribe any time.
We send it with Kit. Privacy