Dryer heating element: test and replace
Electric dryer tumbling but cold? A two-minute meter test tells you if the element is the problem before you spend a dime.
- Difficulty
- Moderate
- Time
- 45 min–2 hr
- Typical part cost
- $30–$90Pro: $100–$350
- Tools
- 6See the list
The test is easy. The swap is a few screws and wires on many dryers, but on some you have to take the drum out to reach it.
What it does
What the element does
Electric dryers only. Gas dryers heat with a burner instead, so if yours runs on gas, this part is not in it.
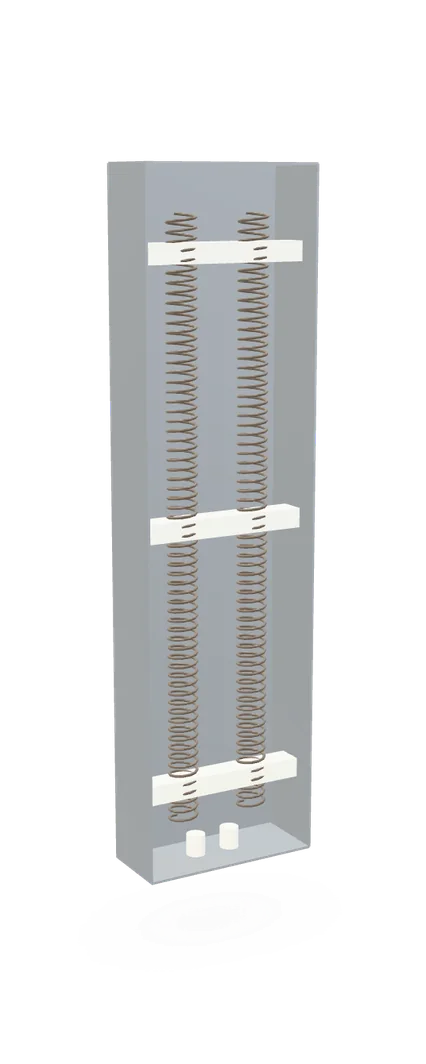
The element is a long coil of resistance wire strung on insulators inside a metal housing. When the dryer calls for heat, 240 V flows through the coil and it gets hot. The blower pulls room air across it and into the drum.
Thermostats and safety parts on the housing switch it on and off to hold the temperature and to stop it overheating.
Why it fails
Years of heating and cooling make the wire brittle until it breaks. A broken coil is an open circuit, and an open element makes no heat at all.
A coil can also sag or break and touch the metal housing. That is a grounded element. It can trip safety parts or run the dryer too hot.
Poor airflow makes everything in the heat path run hotter. A lint-clogged vent is hard on the element, too.
Symptoms
Signs of a bad element
Tumbles, but no heat
The drum turns, the timer runs, but the air stays cold and the clothes stay wet.
Full diagnosisSome heat, then none, or very slow drying
A coil that is about to break, or one touching its housing, can heat on and off. Loads take far longer than they used to.
Full diagnosisA visible break in the coil
With the dryer unplugged and the housing out, look along the coil. A gap, a burned spot or a section touching the metal housing means replace it.
How to test it
Test the element before you buy
- Unplug the dryer.
- Take off the panel that gets you to the element terminals. Check the two wires with a voltage tester, then take a photo.
- Pull both wires off the element terminals so the meter reads only the coil.
- Touch one probe to each terminal and let the number settle.
A good element typically reads
About 10–22 Ω
Typical range. Check your part label or manual for the exact spec. Some elements have two coils and three terminals. Each coil then reads about twice what a single-coil element does, often near 20 Ω. Check your tech sheet for the terminals and values on your model. For a single coil, you can check the math: 57,600 divided by the wattage, so a 5,400 W element works out to about 10.7 Ω.
- Good
- A steady reading in the typical range means the coil is intact. Many single-coil elements read about 10 to 12 Ω. Run the ground test next.
- Bad
- OL means the coil is broken. Replace the element.
- Leave both wires off the element.
- Touch one probe to one element terminal and the other to bare metal on the element housing.
- Repeat with the other terminal.
A good element to its housing shows
No continuity (OL)
Typical range. Check your part label or manual for the exact spec.
- Good
- OL from both terminals means the coil is not touching the housing.
- Bad
- Any reading or a beep means the coil is grounded. Replace the element, even if the first test looked fine.
Safety first
Before you touch anything
- 1
Unplug the dryer
Electric dryers run on 240 V. Pull the plug from the wall, or turn off the dryer's double breaker if you cannot reach it. Check the element wires with a voltage tester before you touch them.
- 2
Let it cool
If the dryer just ran, give the element housing time to cool before you reach in.
Wait about 15 min
- 3
Wear gloves
The housing edges and coil ends are sharp.
Tools you'll need
Grab these first
Tool and part links are affiliate links. We may earn a commission at no extra cost to you, and it never changes what we tell you to check first. How this works
- Nut driver1/4 in. hexMost back panel and element housing screws are 1/4 in. hex heads.Typically $6–$15Shop this tool
- Nut driver5/16 in. hexThe other common dryer screw size.Typically $6–$15Shop this tool
- Digital multimeterΩ, V, µF, µAAn ohm test is the only way to know the coil is broken before you buy one.Typically $25–$60Shop this tool
- Non-contact voltage testerPen styleConfirms the 240 V leads are dead before you touch them.Typically $15–$30Shop this tool
- Needle-nose pliersPulls tight spade connectors off the element terminals.Typically $8–$20Shop this tool
- Painter's tape and markerOptionalLabel each wire before you pull it.Typically $5–$12Shop this tool
- Work glovesHousing edges and coil ends are sharp.Typically $8–$20Shop this tool
Step by step
How to replace the element
- 1
Unplug the dryer
Pull the dryer out from the wall and unplug it. If the plug is out of reach, turn off the dryer's breaker.
- 2
Open the cabinet
On many dryers the element housing is behind the back panel. Remove the screws around its edge and lift it off. On others the element sits behind the drum, and the front panel and drum have to come out first. Your manual or the parts diagram for your model shows which.
Tip. If your dryer needs the drum out, take photos at every step. The belt routing is the part people forget.
- 3
Label and disconnect the wires
Hold the voltage tester to the element wires. It should stay quiet.
Take a photo, then tag each wire with tape. There are wires on the element terminals and on the thermostats on the same housing.
Pull the element wires straight off. Grip the connector, not the wire.
- 4
Test the element
Run the resistance test and the ground test above. If both pass, the element is fine. Check the thermal fuse, high-limit thermostat and cycling thermostat instead.
- 5
Remove the element housing
Remove the screws that hold the housing to the cabinet. Ease it straight out, keeping the coil clear of the edges.
Move the thermostats from the old housing to the new one if your replacement does not come with them. Note which goes where first.
- 6
Match the new element
Hold the new one next to the old. The shape, the terminal positions and the wattage should match, or the part should list your dryer's model number.
Tip. Some designs call for replacing the thermal cut-off and high-limit thermostat together when either is open. If yours tested bad, swap them now while the housing is out.
Buy the part
Heating element
Opens AppliancePartsPros in a new tab. Where’s my model number?
What to look for
- The dryer's model number from the rating plate inside the door, or the part number on the old element.
- The same wattage and voltage as the old element.
- The same shape and terminal layout, so it fits the housing and the wires reach.
- 7
Install the new element
Slide the housing into place the same way the old one came out, and drive the screws in snug.
- 8
Reconnect the wires
Push each wire back onto its terminal, matching your photo and labels. Each connector should feel tight. A loose one can burn.
- 9
Close up and test
Refit the back panel. Check that the vent duct is attached and not crushed, then push the dryer back.
Plug it in and run a timed heat cycle. Within a few minutes the air in the drum should feel warm.
Buy the part
Get the right replacement
Buy the part
Heating element
Opens AppliancePartsPros in a new tab. Where’s my model number?
What to look for
- The dryer's model number from the rating plate inside the door, or the part number on the old element.
- The same wattage and voltage as the old element.
- The same shape and terminal layout, so it fits the housing and the wires reach.
Know your limits
When to call a pro
Stop and call a pro if
- The element reaches only from inside, and you are not comfortable taking the drum out.
- The new element works but the thermal fuse or high-limit thermostat keeps opening. Something else is overheating the dryer.
- You see melted wires, scorched terminals or burned insulation at the terminal block.
- The element and every thermostat test good and there is still no heat. The timer, control board or power supply needs a closer look.
FAQ
Heating element questions
Does my gas dryer have a heating element?
No. Gas dryers heat with a burner. If a gas dryer tumbles but stays cold, look at the igniter and flame sensor first.
My element reads fine. Why is there still no heat?
The element is one link in a chain. The thermal fuse, the high-limit thermostat and the cycling thermostat all have to be closed for power to reach it. Test each one for continuity with the dryer unplugged.
What should a dryer heating element read in ohms?
Many single-coil elements read about 10 to 12 Ω. Elements with two coils read about 18 to 22 Ω across each coil. OL means a coil is broken. Check your part label or manual for your exact number.
Should I replace the thermal fuse too?
Test it. If it is open, yes. And if the element failed after a long stretch of slow drying, clean the exhaust vent before you run the new one.
Related
Keep going
- SymptomDryer runs but won't heatThe drum tumbles but the air stays cold. On an electric dryer, start with the breaker and the thermal fuse. On a gas dryer, start with the gas shutoff and watch the igniter.Open guide
- SymptomDryer takes too long to dryLoads need two cycles, or come out damp. On gas and electric dryers alike, the usual cause is restricted airflow: a clogged lint screen, a blocked vent or a crushed duct. Load size matters too.Open guide
- Dryer partThermal fuseThe thermal fuse is a one-time safety fuse that blows when the dryer overheats. Gas and electric dryers both have one. A blown fuse is a warning about airflow, so clean the vent before you replace it.Open guide
- Dryer partHigh-limit thermostatThe high-limit thermostat cuts the heat if the dryer overheats. Gas and electric dryers both have one, at the heat source. If it fails open, the dryer tumbles with no heat.Open guide
- Dryer partCycling thermostatThe cycling thermostat switches the heat on and off to hold the drying temperature. Gas and electric dryers both use one. When it fails, the dryer gets no heat or runs too hot.Open guide
- Dryer partExhaust vent and ductThe exhaust duct carries hot, damp air and lint from the back of the dryer to a hood outside. When lint packs into it, drying slows and the dryer runs hot. Gas and electric dryers both need it cleaned about once a year.Open guide