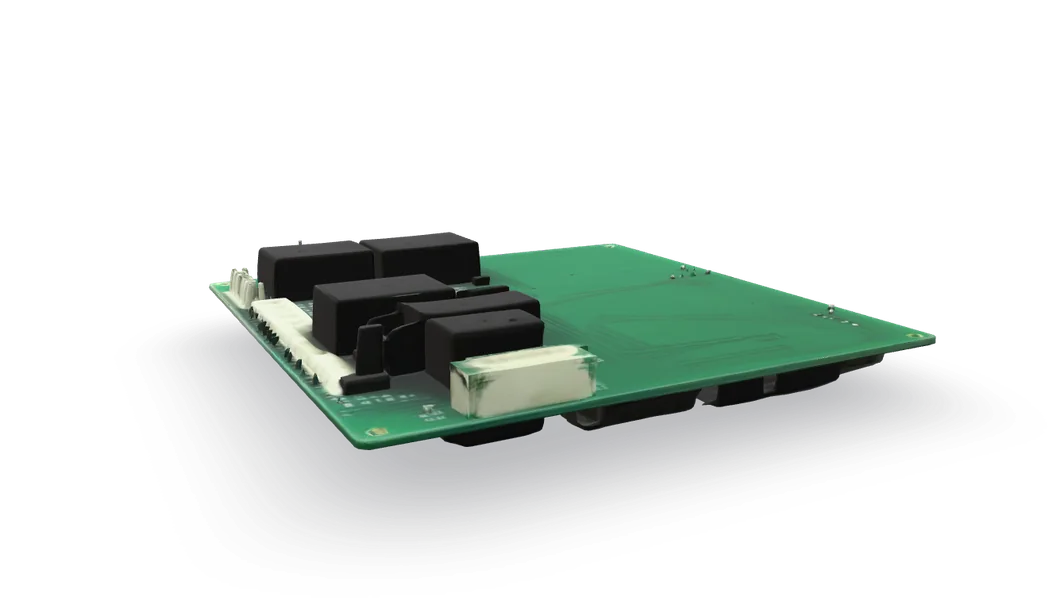
Dryer timer or control board: test before you replace
The timer or board runs the whole cycle, so it gets blamed for a lot. Most of the time a cheaper part is the real problem. Here is how to be sure first.
- Difficulty
- Moderate
- Time
- 15 min–2 hr
- Typical part cost
- $50–$300Pro: $150–$450
- Tools
- 3See the list
Opening the control console varies by model, and there can be many wires to move over. Careful photos and labels make it straightforward.
What it does
What the timer / board does
On an older dryer, a mechanical timer sits behind the dial. A small motor inside turns a set of cams, which open and close contacts to switch the drum motor and the heat on and off as the cycle counts down.
On auto or sensor cycles, the timer only counts down while the dryer is not heating, or when the dryer senses the clothes are dry. So a heating or sensing problem can look like a stuck timer.
On a newer dryer, an electronic control board does the same job. It reads the buttons, runs the motor and heat through relays, and shows the time left and any error codes on the display.
Gas and electric dryers both use one or the other, and the steps on this page apply to both.
Why it fails
In a mechanical timer, the small timer motor can burn out, so the dial stops turning. The contacts can also wear or pit until they no longer carry current reliably.
On an electronic board, a relay can burn out and leave a scorched spot on the board. Voltage spikes can also damage the electronics.
Good news: many problems blamed on the timer or board come from cheaper parts. A blown thermal fuse, a bad door switch, a coated moisture sensor, a cycling thermostat or a clogged vent can all look like a bad timer.
Symptoms
Signs of a bad timer / board
Timer will not advance on timed dry
On a timed cycle the dial never moves, so the dryer runs until you stop it. If it advances on timed dry but stalls only on auto dry, the timer is probably fine.
Full diagnosisWill not start, after the basics check out
The dryer does nothing, but the breaker is on, the door switch and thermal fuse test good, and the start button works.
Full diagnosisDark display with power
On an electronic dryer, the display stays dark even though the outlet has power and the breaker is on.
Full diagnosisScorch marks on the board
With the console open and the dryer unplugged, you see a burned spot, melted plastic or charred traces on the board.
How to test it
Test the timer / board before you buy
- Check the breaker and that the plug is fully in the outlet.
- Test the door switch and the thermal fuse. Both are cheap and quick.
- If the problem is only on auto dry, run a timed dry cycle. If the dial counts down normally there, look at the moisture sensor, the cycling thermostat and the exhaust vent instead.
- Good
- Everything else checks out and the problem stays. Move on to the timer tests, or look at the board.
- Bad
- One of the cheaper parts is bad. Fix that first and try again before you buy a timer or board.
- Unplug the dryer and open the control console.
- Find the two wires that go to the small timer motor on the timer body. Check your wiring diagram. Take one of them off.
- Touch one probe to each timer motor terminal.
A good timer motor typically reads
About 2,000–3,000 Ω
Typical range. Check your part label or manual for the exact spec. Timer motors vary. Electronic control boards cannot be tested this way.
- Good
- A reading in the range, or a bit above it on some timers, means the motor winding is intact.
- Bad
- OL means the motor is open. A reading far outside the range also points to a bad timer.
- With the dryer unplugged, find the contact pair for the drum motor on your wiring diagram or timer chart.
- Set the dial to a running position on a timed cycle.
- Touch one probe to each terminal of that pair.
Closed contacts typically read
Near 0 Ω (continuity)
Typical range. Check your part label or manual for the exact spec. Worn contacts can pass this test and still fail under load. If everything else checks out, the timer may still be the cause.
- Good
- Continuity in a running position, and open with the dial on off.
- Bad
- No continuity in a running position means the contacts are bad. Replace the timer.
Safety first
Before you touch anything
- 1
Unplug the dryer
Pull the dryer's plug from the wall before you open the console. Turning the dial to off is not enough.
- 2
Gas dryer? Close the gas shutoff too
This job is nowhere near the burner, but closing the gas shutoff behind the dryer is a cheap second layer of safety. Turn the handle a quarter turn so it sits crosswise to the pipe.
Tools you'll need
Grab these first
Tool and part links are affiliate links. We may earn a commission at no extra cost to you, and it never changes what we tell you to check first. How this works
- Multi-bit screwdriverPhillips, flat, squareMost control consoles are held by a few Phillips or hex screws.Typically $10–$25Shop this tool
- Nut driver1/4 in. hexOptionalSome console and timer screws are 1/4 in. hex heads.Typically $6–$15Shop this tool
- Digital multimeterΩ, V, µF, µATests a mechanical timer's motor and contacts before you buy.Typically $25–$60Shop this tool
- Painter's tape and markerLabel every wire before it comes off. Timers can have a lot of them.Typically $5–$12Shop this tool
- Putty knifeStiff, 1-1/2 in.OptionalSome consoles and top panels are held by spring clips.Typically $5–$12Shop this tool
Step by step
How to replace the timer / board
- 1
Unplug the dryer
Pull the dryer out far enough to reach the plug and unplug it.
On a gas dryer, also turn the gas shutoff handle crosswise to the pipe.
- 2
Open the control console
The timer or board sits inside the control console, the panel with the dial or buttons. Your manual or the wiring sheet inside the dryer shows how yours opens. On most it is a few screws.
Pull the timer knob straight off first if it is in the way.
- 3
Photograph and label every wire
Take clear photos of the timer or board from a few angles, with every wire visible.
Put a small piece of tape on each wire or plug and write where it goes. Do this before anything comes off.
Tip. Many replacement timers come with a terminal map. Your photos are still your best guide.
- 4
Unplug the wiring
Pull each connector or terminal off. Grip the connector, not the wire.
- 5
Remove the old timer or board
Take out the screws or release the clips that hold it, and lift it out of the console.
- 6
Match the replacement
Check the part number on the old timer or board against the new one, or confirm the new one lists your dryer's model number.
Compare the connectors and terminals. They should line up with your photos.
Buy the part
Timer or control board
Opens AppliancePartsPros in a new tab. Where’s my model number?
What to look for
- Your dryer's model number from the rating plate inside the door. Search by that.
- The part number printed on the old timer or board.
- For an electronic dryer, the board that controls the cycle, not the separate display or button board, unless that is the part that failed.
- 7
Mount the new part
Set the new timer or board in place and refit its screws or clips.
- 8
Reconnect every wire
Move each wire to the matching spot on the new part, using your labels and photos. Push each one on firmly.
Check twice. A wire on the wrong terminal can stop the dryer or damage the new part.
- 9
Close up and test
Close the console and refit the knob. Open the gas shutoff on a gas dryer, then plug the dryer in.
Run a short timed cycle before you load it. The drum should turn, the heat should come on, and the time should count down.
Buy the part
Get the right replacement
Buy the part
Timer or control board
Opens AppliancePartsPros in a new tab. Where’s my model number?
What to look for
- Your dryer's model number from the rating plate inside the door. Search by that.
- The part number printed on the old timer or board.
- For an electronic dryer, the board that controls the cycle, not the separate display or button board, unless that is the part that failed.
Know your limits
When to call a pro
Stop and call a pro if
- Gas dryer and you smell gas. Do not touch any switches. Leave the house and call your gas utility from outside.
- You see scorch marks, melted wires or a burning smell at the console. Find out why before you fit a new part.
- A new board fails again soon. That can point to a wiring fault or a problem elsewhere in the dryer.
- Your electronic dryer shows an error code you cannot look up in the manual.
- You have replaced the timer or board and the problem is still there.
FAQ
Timer or control board questions
How do I know it is really the timer or board?
Rule out the cheaper parts first: the breaker, the door switch and the thermal fuse. If the problem only happens on auto dry, check the moisture sensor and the cycling thermostat. Then test a mechanical timer with a meter.
My timer will not advance on auto dry. Is it the timer?
Often not. Try a timed dry cycle. If the dial counts down there, the timer motor works. The problem is more likely the moisture sensor bars, the cycling thermostat, or no heat at all, because the timer waits on those during an auto cycle.
Can I test an electronic control board myself?
Only so far. You can look for burned spots and loose connectors, and check that power reaches the dryer. Beyond that, board tests and diagnostic modes are specific to each model. Your manual or the wiring sheet inside the dryer may list them.
Is it worth replacing a control board?
It depends on the dryer's age and condition. A board often costs a few hundred dollars installed. Compare that with the cost of a new dryer before you decide.
Related
Keep going
- SymptomDryer won't startThe dryer is dead, the lights come on but the drum never turns, or it hums without starting. Start with the breaker and the door, then the thermal fuse, the door switch and the start switch.Open guide
- SymptomDryer takes too long to dryLoads need two cycles, or come out damp. On gas and electric dryers alike, the usual cause is restricted airflow: a clogged lint screen, a blocked vent or a crushed duct. Load size matters too.Open guide
- SymptomDryer shuts off earlyThe cycle ends, or the dryer stops mid-cycle, and the clothes are still damp. On gas and electric dryers, the usual causes are a blocked vent making it overheat, a coated moisture sensor, or a door that will not stay shut.Open guide
- Dryer partDoor switchGas and electric dryers both have one. The door switch tells the dryer the door is shut. If it fails, the dryer will not start, even with the door closed. It is cheap, easy to test, and usually comes out with a plug and a clip or one screw.Open guide
- Dryer partThermal fuseThe thermal fuse is a one-time safety fuse that blows when the dryer overheats. Gas and electric dryers both have one. A blown fuse is a warning about airflow, so clean the vent before you replace it.Open guide
- Dryer partCycling thermostatThe cycling thermostat switches the heat on and off to hold the drying temperature. Gas and electric dryers both use one. When it fails, the dryer gets no heat or runs too hot.Open guide
- Dryer partDrive motorThe drive motor turns the drum through the belt and, on many dryers, spins the blower fan too. It is one of the bigger dryer repairs. Gas and electric dryers both have one.Open guide