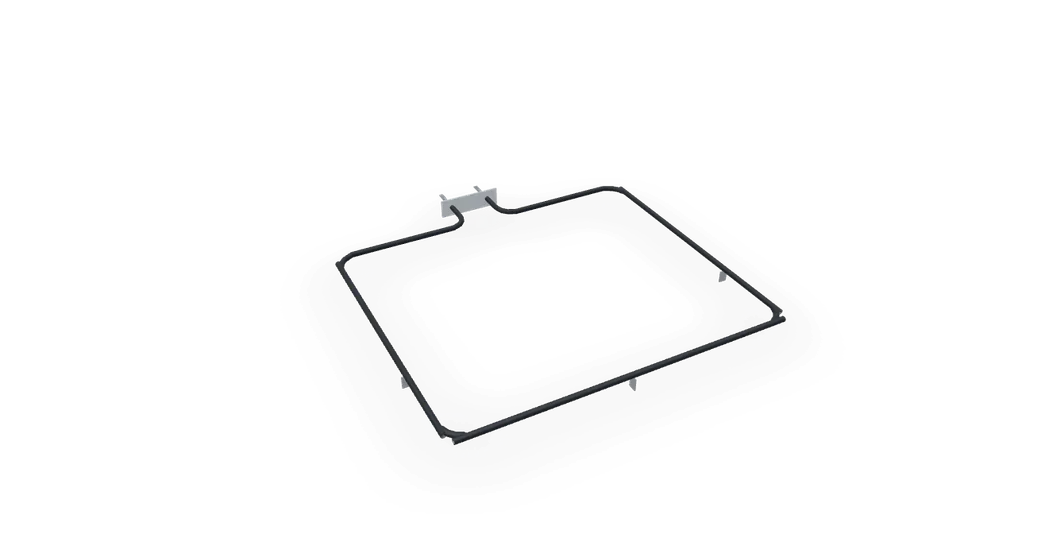
Oven bake element test and replacement
Electric ranges only. If the oven will not heat from the bottom, this is the most likely part, and on most ovens it comes out of the back wall with two screws.
- Difficulty
- Easy
- Time
- 15–45 min
- Typical part cost
- $20–$60Pro: $150–$400
- Tools
- 4See the list
Unplug, take out two screws in the oven's back wall, pull the element forward and swap two wires. Hidden elements under a flat floor take longer.
What it does
What the bake element does
The bake element is a metal-sheathed heating loop along the bottom of the oven. Some ovens hide it under a flat oven floor. When you set the oven to bake, the control sends it 240 V and it glows red.
It does most of the work while baking. The broil element at the top handles broiling.
Gas ovens do not have one. They heat with a bake burner lit by a gas igniter.
Why it fails
The element's coil burns through with age. Often you can see where: a blister, a bubble, a split, or a spot that sparked brightly before it went dark.
Symptoms
Signs of a bad bake element
No heat on bake
The oven shows it is baking but the bottom element stays dark and the oven barely warms. Broil may still work.
Full diagnosisBlister, split or burn mark
Look closely at the element. A bubble, a crack, a break or a scorched spot means it is done.
Part of it stays dark
Only some of the loop glows red, or the oven heats slowly and unevenly.
Full diagnosisA bright spark, then nothing
A flash or sparking from the element just before it stopped working.
How to test it
Test the bake element before you buy
- Set the oven to bake at 350°F with the door closed.
- After a few minutes, open the door and look at the bottom element.
Hidden elements under the oven floor cannot be seen. Feel for heat rising from the floor, or go straight to the meter test.
- Good
- The whole loop glows an even red. The element works. If the oven still runs cool, look at the [temperature sensor](/range-oven/oven-temperature-sensor).
- Bad
- It stays dark, or only part of it glows. Turn the oven off, unplug the range and test it with a meter.
- Unplug the range or turn off its breaker, and let the oven cool.
- Pull the element forward far enough to reach its terminals, and pull one wire off (steps below).
- Touch one probe to each terminal.
A good bake element typically reads
About 10–50 Ω (many read about 17–30 Ω)
Typical range. Check your part label or manual for the exact spec.
- Good
- A steady reading in that range means the element is intact. Do the ground test too.
- Bad
- OL means it is open. Replace it.
- With the wires still off, touch one probe to a terminal and the other to the element's metal sheath.
- Repeat with the other terminal.
A good element typically reads
Open (OL) from either terminal to the sheath
Typical range. Check your part label or manual for the exact spec.
- Good
- No continuity to the sheath from either terminal.
- Bad
- Any continuity means the element is shorted to its sheath. Replace it.
Safety first
Before you touch anything
- 1
Unplug it or switch off both breakers
An electric range runs on 240 V. Unplug it, or turn off its double breaker. If the panel has two single breakers for the range, turn both off. Check with a voltage tester before you touch the wires.
- 2
Let the oven cool
Give the oven time to cool completely before you reach in.
Wait about 30 min
Tools you'll need
Grab these first
Tool and part links are affiliate links. We may earn a commission at no extra cost to you, and it never changes what we tell you to check first. How this works
- Nut driver1/4 in. hexThe element's mounting screws are usually 1/4 in. hex heads.Typically $6–$15Shop this tool
- Multi-bit screwdriverPhillips, flat, squareSome elements use Phillips screws, and some terminals have screws.Typically $10–$25Shop this tool
- Digital multimeterΩ, V, µF, µAA resistance check confirms the element is open before you buy one.Typically $25–$60Shop this tool
- Needle-nose pliersHelps pull push-on wire connectors off the terminals.Typically $8–$20Shop this tool
Step by step
How to replace the bake element
- 1
Power off
Unplug the range, or turn off its breaker. If you pull the range out to reach the plug, slide it onto cardboard to protect the floor.
- 2
Clear the oven
Take out the racks. On many ovens it is easier with the door off: open it fully, flip the hinge locks toward the door, close it partway and lift it off. Lay it on a towel.
- 3
Remove the mounting screws
Find the two screws that hold the element's bracket to the back wall of the oven. Remove them and keep them.
- 4
Pull it forward and disconnect it
Gently pull the element toward you. Its terminals and a few inches of wire come through the back wall.
Pull the wires off the terminals, or remove the terminal screws. Do not let the wires slip back through the wall: hold them or clip a clothespin on them.
Tip. If the wires are too short to reach, they are reached from the rear panel on the back of the range instead.
- 5
Match the new element
Compare the new element with the old one: the shape, the length, the bracket and the terminal type should all match.
Buy the part
Bake element
Opens Amazon in a new tab. Where’s my model number?
What to look for
- Your range's model number. Elements differ in shape, length and wattage.
- The same terminal type and bracket as the old one.
- Visible or hidden: a hidden element under the oven floor is a different part and a longer job.
Universal bake elements exist, but the shape and bracket must match. The part for your model is safer.
- 6
Connect and mount the new element
Push the wires firmly onto the new element's terminals, or fasten them with the terminal screws.
Slide the terminals back through the wall, line up the bracket and refit the two screws. Snug is enough.
- 7
Power on and test
Refit the door and racks. Push the range back so its rear leg engages the anti-tip bracket, and restore power.
Set bake to 350°F. The element should glow evenly. Check the temperature with an oven thermometer once it has preheated.
Buy the part
Get the right replacement
Buy the part
Bake element
Opens Amazon in a new tab. Where’s my model number?
What to look for
- Your range's model number. Elements differ in shape, length and wattage.
- The same terminal type and bracket as the old one.
- Visible or hidden: a hidden element under the oven floor is a different part and a longer job.
Universal bake elements exist, but the shape and bracket must match. The part for your model is safer.
Know your limits
When to call a pro
Stop and call a pro if
- The element is hidden under the oven floor and you would have to remove the back panel or insulation to reach it.
- The wires to the element are burned, melted or too short to reach.
- A new element works but the breaker trips, or the oven still will not hold temperature.
FAQ
Bake element questions
Broil works but bake does not. Is it the bake element?
Usually. If the top element heats on broil but the bottom one stays dark on bake, the bake element is the likely problem. If neither heats, check the breaker first, then the control board.
Is it safe to use the oven with a damaged element?
No. A blistered or split element can arc and spark. Turn the oven off and replace it.
How do I know if my oven has a hidden element?
If the oven floor is smooth with no element showing, it is hidden under the floor. How you reach it varies by model, so check your manual or the service sheet before you start.
Related
Keep going
- SymptomOven not heatingThe oven will not heat, or barely warms. On an electric range the bake element is the usual cause, after the breaker. On a gas range a weak igniter is the most likely, after the gas supply. The sensor and the control come later.Open guide
- SymptomOven temperature wrongFood burns, stays raw or browns unevenly. Measure the real temperature first. A small, steady offset is often fixed in the settings. A big swing usually means a temperature sensor, an element or igniter that is failing, or a door that does not seal.Open guide
- Range partBroil elementElectric ranges only. The broil element is the heating loop across the top of the oven. When it burns out, broiling stops. It mounts the same way as the bake element.Open guide
- Range partOven temperature sensorThe temperature sensor is the thin probe on the oven's back wall. It tells the control how hot the oven is. When it drifts or fails, the oven runs too hot or too cool, or the control shows an error and stops heating.Open guide
- Range partOven control boardThe control board is the electronic control behind the keypad and display. It reads the temperature sensor and switches the bake and broil elements or the gas igniters. When it fails, the display goes dead or garbled, keys stop responding, or the oven will not heat even with good parts.Open guide
Get the next fix before it breaks
A short email when the seasons turn: filters to change, detector batteries to check, and new repair guides. No spam, unsubscribe any time.
We send it with Kit. Privacy